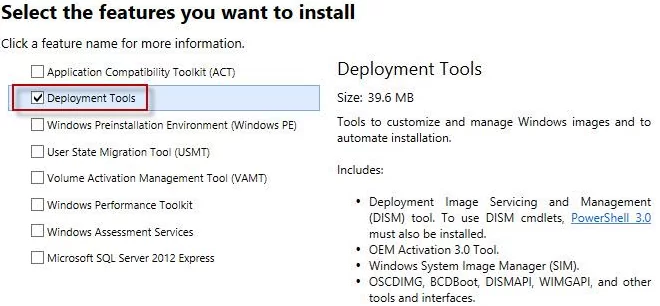
You can simplify the deployment of the operating system on typical workstations (servers) if you add all the necessary drivers to the Drive Store of your Windows install image. In this case, after installing Windows, you don’t have to manually download and install specific drivers (including AHCI/RAID/NVMe) on each computer.
In this article, we’ll show you how to integrate device drivers directly into a Windows 10 offline install image (it can be an ISO/WIM file or a VHD/VHDX file with an OS template). The instruction is applicable for all supported versions of Windows 11, 10, 8.1 and for Windows Server 2022, 2019, 2016, and 2012 R2.
In current Windows editions, you can add drivers to the installation ISO image in two ways:
- using the DISM tool;
- with PowerShell CLI.
Inject Drivers into a Windows Install Image using PowerShell
Download and copy all the necessary device drivers in one directory (you need to create a separate folder for each driver). Please note that many vendors (including Dell, HP, Lenovo, etc.) supply their drivers in the form of self-extracting exe or zip archive files. Such archives must be unpacked to a local disk so that inf, cat, and sys files are located in the directory with the driver.
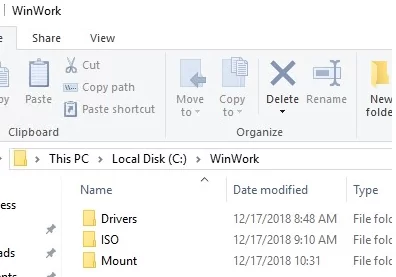
Before you start, create the following directory structure on your local drive:
- The Drivers folder – it contains unpacked driver files for your computer (which are supposed to be integrated into the Windows 10 install media);You can manually download and extract the necessary driver files or export all third-party drivers from a reference Windows 10 computer that has all the necessary drivers already installed using the Export-WindowsDriver cmdlet.
- The ISO folder – this directory contains the extracted Windows 10 ISO image. You only need the install.wim file from the Sources directory;
- The Mount folder – an empty directory into which the Windows install WIM image will be mounted.

List all Windows editions contained in the install.wim file using the Get-WindowsImage PowerShell cmdlet. This will allow you to get an index of the Windows edition in which you plan to integrate additional drivers.
Get-WindowsImage -ImagePath C:\WinWork\ISO\install.wim
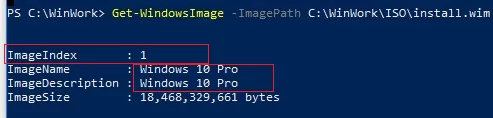
In our example, the WIM file contains only one Windows 10 Pro edition with the index 1 (ImageIndex: 1).
DISM /export-image /SourceImageFile:"C:\WinWork\ISO\install.esd" /SourceIndex:4 /DestinationImageFile:C:\WinWork\ISO\install.wim /Compress:max /CheckIntegrity 
Next, you need to mount the image of the selected Windows edition to the Mount directory. As an argument to the Index parameter, specify the index of the Windows image you want to mount:
Mount-WindowsImage -Path C:\WinWork\Mount\ -ImagePath C:\WinWork\ISO\install.wim -Index 1

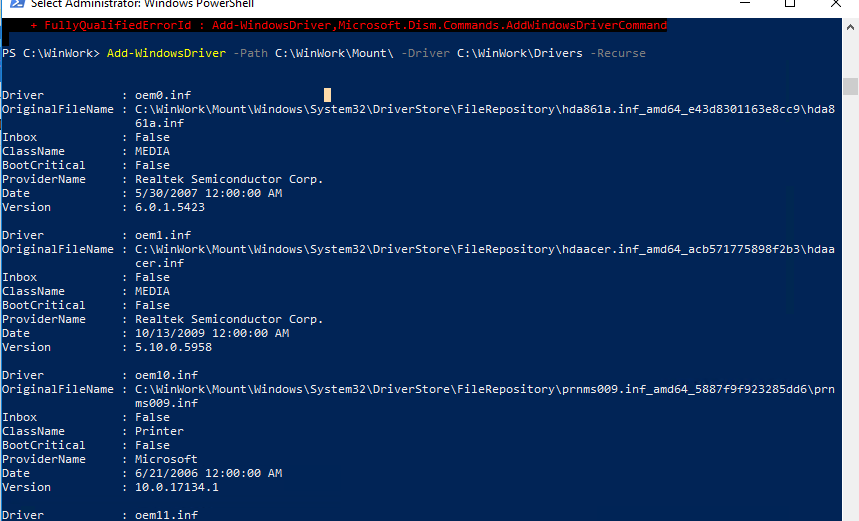
After the image is mounted, you can add drivers to it from the Drivers directory using the command:
Add-WindowsDriver -Path C:\WinWork\Mount\ -Driver C:\WinWork\Drivers -Recurse
The Add-WindowsDriver cmdlet will recursively scan (the -Recurse parameter) the specified folder for all *.inf files with the driver description. According to the description in the inf file, the cmdlet will add the dependent INF, DLL, CAT, PNF, etc. files to the offline Driver Store of your Windows image.
After the driver’s files have been copied, commit your changes and unmount the WIM image.
Dismount-WindowsImage -Path C:\WinWork\Mount\ –Save

In this example, we have added drivers to the install.wim image file. This is the Windows image that will be deployed to the local drive of the computer. If you need to add drivers to a Windows boot image (WinPE environment used to boot the computer and run the Windows Setup), you need to add drivers to the Boot.wim file. This is usually needed if Windows Setup doesn’t detect local hard drives, video, or network adapters. Usually, it is enough to add only drivers for disk controllers or network adapters to the boot.wim image.
You can convert your install.wim file containing the Windows installation image with integrated drivers into the install.esd format using the DISM compress option:
DISM /Export-Image /SourceImageFile:C:\WinWork\ISO\install.wim /SourceIndex:1 /DestinationImageFile:C:\WinWork\ISO\install.esd /Compress:recovery
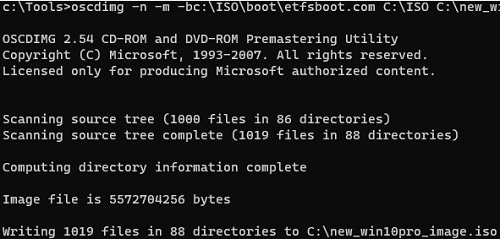
It remains to create an ISO file using Dism++ or the oscdimg tool and write it to a disk or USB flash drive:
oscdimg -n -m -bc:\WinWork\ISO\boot\etfsboot.com C:\WinWork\ISO C:\new_win10pro_image.iso
This command will create an ISO image for installation on a computer with BIOS firmware or in UEFI Legacy mode (CSM/Compatible Support Mode).
In order to generate a universal ISO image with both UEFI and BIOS support, use the command:
oscdimg.exe -h -m -o -u2 -udfver102 -bootdata:2#p0,e,bc:\winwork\iso\boot\etfsboot.com#pEF,e,bc:\winwork\iso\efi\microsoft\boot\efisys.bin -lWin10 c:\iso c:\new10image.iso
To burn an ISO image file to a USB flash drive, the easiest way is to use the Rufus utility.
Now you can use your custom image to deploy Windows on computers from a local boot device (USB disk or flash drive) or install Windows over the network (using PXE boot).
Add Drivers to an Offline Windows Server Image Using DISM
Now we will show an example of adding drivers into a Windows Server 2022 install image.
Use the same directory structure: Drivers (drivers and *.inf files are stored here), ISO (unpacked image of Windows Server 202), Mount (image mount directory). All image modification operations are performed from a Windows 10 desktop computer.
List the editions in a WIM file:
Dism /Get-ImageInfo /imagefile:"C:\iso\sources\install.wim"
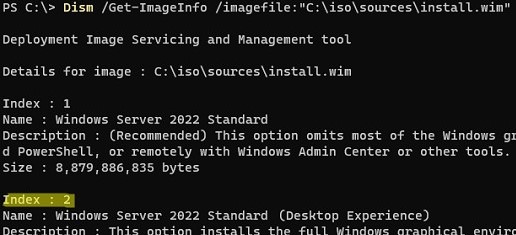
In this example, I going to inject drivers to a Windows Server 2022 Standard (Desktop Experience) image with Index:2.
Mount the install.wim installation image:
dism /Mount-Wim /WimFile:c:\iso\sources\install.wim /Index:2 /MountDir:c:\mount
Now search for drivers (recursively) and add new drivers into the driver store of the Windows Server 2022 image:
dism /image:c:\mount /Add-Driver "/driver:c:\drivers\" /recurse
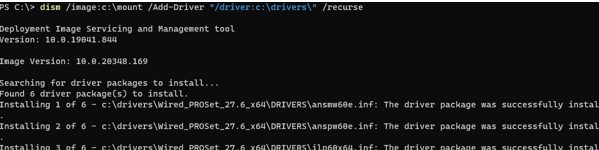
You will see the following message for each successfully added driver:
driver.inf: The driver package was successfully installed.
Save the changes to the WIM image:
dism /unmount-wim /mountdir:d:\mount /commit
If you want to add drivers to all Windows Server editions contained in the installation image, you must perform these steps for all indexes in the install.wim file.
Remove Driver Packages from a Windows Image
In some cases, you may need to remove drivers from the Windows WIM installation image (when removing old/incorrect drivers, or reducing the size of the ISO image).
To do this, mount the offline WIM image to a local folder:
Mount-WindowsImage -Path C:\Mount\ -ImagePath C:\iso\sources\install.wim -Index 2
List third-party drivers in the offline Windows image:
Get-WindowsDriver -Path "c:\Mount"
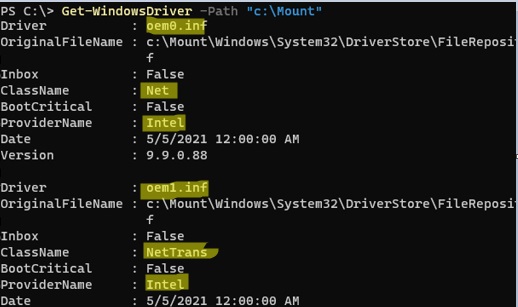
To remove a specific driver, you need to specify its inf file name (oem<number>.inf):
Remove-WindowsDriver -Path "c:\offline" -Driver "OEM0.inf"
![]()
You can remove specific vendor drivers from an image. In this example, we’ll remove all Intel drivers:
$drivers = get-windowsdriver -path C:\mount
 $drivers | where-object {$_."ProviderName" -eq 'Intel' }  | Remove-WindowsDriver -Path C:\Mount
Commit changes to the WIM image file:
Dismount-WindowsImage -Path C:\Mount -save
%WINDIR%\System32\DriverStore\FileRepository) can grow significantly, so you need to remove old drivers from the driver store periodically.
13 comments
Thanks for posting found it very helpful.
There is a missing double co colon right after SourceImageFile when trying to convert back to install.esd
DISM /Export-Image /SourceImageFile:C:\WinWork\ISO\install.wim /SourceIndex:1 /DestinationImageFile:C:\WinWork\ISO\install.esd /Compress:recovery
for the
oscdimg -n -m -bc:\ISO\boot\etfsboot.com C:\ISO C:\new_win10pro_image.iso
you got all the paths wrong, it should be c:\winwork\iso you are missing that directory in your sample
I have 3 oddball Windows 10 tablets. I have Windows System Image backups for them, but Windows can’t see them. I just really need the driver’s from the images. Would I be able to extract them from the images using any of the above methods? I’m frustrated and confused at this point. I’ve tried many different things and nothing has worked. I would appreciate any advice. Thanks.
Mount your vhdx file from your Windows System State Backup to a separate drive letter (for instance, e:) and try to export the installed device drivers from your offline image as follow:
Export-WindowsDriver -Path e:\windows -Destination c:\DriverBackup
DISM /Export-Image /SourceImageFile C:\WinWork\ISO\install.wim /SourceIndex:1 /DestinationImageFile:C:\WinWork\ISO\install.esd /Compress:recovery
“C:\WinWork\ISO\install.wim”
Is not a known command-line option.
The colon is missing right after SourceImageFile. I fixed the command in the post. Thanks!
You should use the command:
DISM /Export-Image /SourceImageFile:C:\WinWork\ISO\install.wim /SourceIndex:1 /DestinationImageFile:C:\WinWork\ISO\install.esd /Compress:recovery
Excellent tutorial. Thank you.
Just as mentioned by J00D, the path for the creation of the ISO need to be commented.
.\oscdimg -n -d -m -bC:\WinWork\Original\iso\boot\etfsboot.com C:\WinWork\Original\iso\ C:\WinWork\new_win10pro_image.iso
Where “C:\WinWork\Original\iso\” is the location of the full original content of the ISO. The one expanded at the very beginning.
Also, “oscdimg” can be downloaded from https://answers.microsoft.com/en-us/windows/forum/windows_7-windows_install/where-is-oscdimgexe/b6ccd22e-b478-4222-b370-d5aaf021f575
And you could add to “oscdimg” the parameter “-d” to keep the case definition (lower or upper).
This is a fantastic article!
This is a fantastic guide, but when I tried to install Windows it says that install.esd is corrupted or something and can’t go further.
During the conversion I had no errors.
NVM I used the WIM file and it went well.
Hi great article and very helpful – I have followed all, however, after the following:
oscdimg -n -m -bc:\ISO\boot\etfsboot.com C:\ISO C:\new_win10pro_image.iso
when I use Rufus to create a bootable USB, the final iso created is not accepted as a bootable media – any ideas?
any help or suggestions with once completing your helpful guide, burning the iso to USB? When using rufus I get the following error message:
Unsupported image
This image is either non-bootable, or It uses a boot or
compression method that is not supported by Rufus…