Windows OS Hub
  • Windows Server
    • Windows Server 2022
    • Windows Server 2019
    • Windows Server 2016
    • Windows Server 2012 R2
    • Windows Server 2008 R2
    • SCCM
  • Active Directory
    • Active Directory Domain Services (AD DS)
    • Group Policies
  • Windows Clients
    • Windows 11
    • Windows 10
    • Windows 8
    • Windows 7
    • Windows XP
    • MS Office
    • Outlook
  • Virtualization
    • VMWare
    • Hyper-V
    • KVM
  • PowerShell
  • Exchange
  • Cloud
    • Azure
    • Microsoft 365
    • Office 365
  • Linux
    • CentOS
    • RHEL
    • Ubuntu
  • Home
  • About

Windows OS Hub

  • Windows Server
    • Windows Server 2022
    • Windows Server 2019
    • Windows Server 2016
    • Windows Server 2012 R2
    • Windows Server 2008 R2
    • SCCM
  • Active Directory
    • Active Directory Domain Services (AD DS)
    • Group Policies
  • Windows Clients
    • Windows 11
    • Windows 10
    • Windows 8
    • Windows 7
    • Windows XP
    • MS Office
    • Outlook
  • Virtualization
    • VMWare
    • Hyper-V
    • KVM
  • PowerShell
  • Exchange
  • Cloud
    • Azure
    • Microsoft 365
    • Office 365
  • Linux
    • CentOS
    • RHEL
    • Ubuntu

 Windows OS Hub / Windows 10 / AutoRedial for VPN Connections in Windows 8/10/2012

May 10, 2023 Windows 10Windows 8Windows Server 2012 R2

AutoRedial for VPN Connections in Windows 8/10/2012

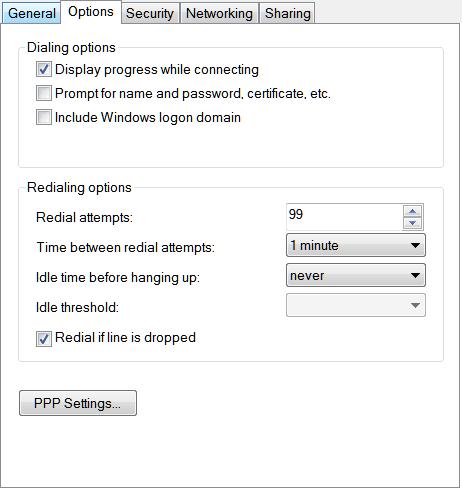
I was surprised, not much, however, when I found that in Windows 8 and Windows Server 2008 or higher Microsoft had slightly “refined” the VPN connection settings. To be more precise, removed a number of settings in the Options tab. Here is what it looked like in Windows 7:

VPN conection option in Windows 7

Now(Windows 8, Windows 10) almost everything has been removed:

VPN option tab Windows 8 / Windows 2012

A natural question has arised — how to configure automatic reconnection and the number of attempts to establish the connection if it is interrupted?

There are several ways to do it. Let’s start with the beginning, according to the level of difficulty.

Method 1 — Using Notepad

You have to set the parameters manually. To do it, go to the folder

C:\Users\[USER]\AppData\Roaming\Microsoft\Network\Connections\Pbk\

There, find a file (it is likely to be only one) with the name rasphone.pbk. It is a usual text file, which contains the VPN connection settings

You can open this file using notepad.exe

Usually you have to find a section containing your VPN, e. g., like this [PPTP-VPN]

Find the lines in it. If you haven’t made any changes, they look like this:

RedialAttempts=3
RedialSeconds=60
IdleDisconnectSeconds=0
RedialOnLinkFailure=1

So Microsoft has decided it for you again.

But now you know where to find and change the necessary parameters.

  • RedialAttempts=3                 – the number of redial attempts (99 maximum)
  • RedialSeconds=60                 – the number of seconds between the redial attempts
  • IdleDisconnectSeconds=0     — the waiting time before it becomes clear that there is a disconnection (0 – don’t wait)
  • RedialOnLinkFailure=1         — Redial if connection fails? 1 – yes, 0 – no

To apply the parameters, you have to restart your VPN connection, as earlier.

And then believe that Microsoft will do everything for you

Note. It has been noticed that Windows Server 2012 can use C:\Users\[USER]\AppData\Roaming\Microsoft\Network\Connections\Pbk\_hiddenPbk folder on its own initiative and locate rasphone.pbk in this folder.

Method 2 — Configuration of a Simple Task

Create a task in Task Scheduler, which will run a BAT file containing the VPN connection string and configure this task so that it runs, say, every 5 minutes.

I should remind that the command string to establish a VPN connection looks like this:

C:\windows\system32\rasdial.EXE entryname [username [password|*]] [/DOMAIN:domain]

There are other parameters, but if it is interesting to you find them yourself.

Don’t forget to check “Run whether user is logged on or not” in the task settings

VPN Redial task

Specify the executable file, for example:

rasdial.bat

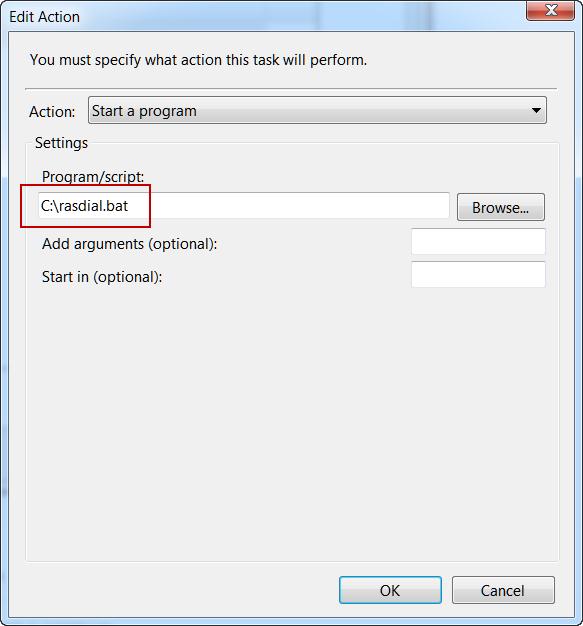
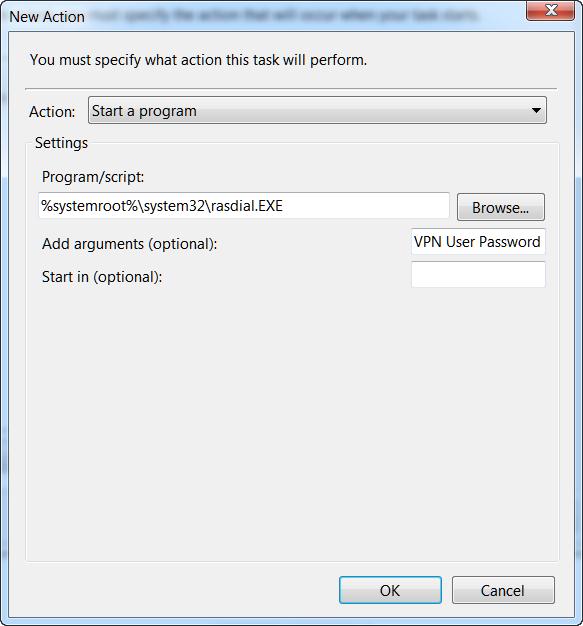
Or let rasdial.exe start (VPN User Password is the name of your VPN connection, user_name and password)

rasdial.exe vpn connection

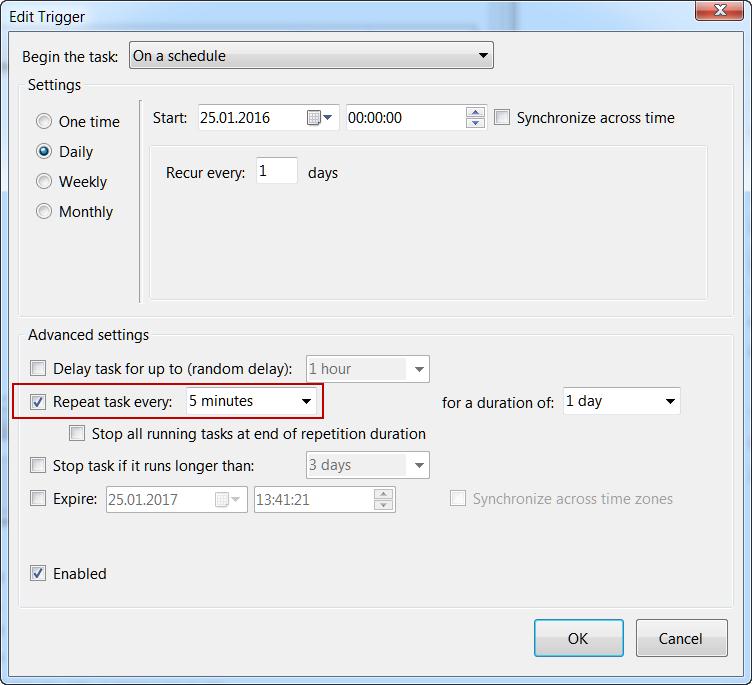
Start it every 5 minutes every day.

repeat task every 5 minutes

Method 3 — Configure a Tricky Task

  1. Create a task in Task Scheduler
  2. Set two triggers in the task. The first one will use an XML query (like it has been described in the article “How to Start a Scheduler Task After the Previous Task“)

<QueryList>
<Query Id="0" Path="Application">
<Select Path="Application">*[System[Provider[@Name='RasClient'] and (EventID=20226)]] and *[EventData[Data[4]='829' or '629']]</Select>
</Query>
</QueryList>

Note. Values: 829 — Remote Disconnect, 629 -Client Disconnect

The second trigger is based on tracking of the event in the Event Log:

  • Log name: Microsoft-Windows-NetworkProfile/Operational
  • Source: NetworkProfile
  • Event ID: 10000
  • Select rasdial.exe with the parameters vpn-name username password as a program to be started
  • Also, in the Conditions tab, you can check the following parameters:
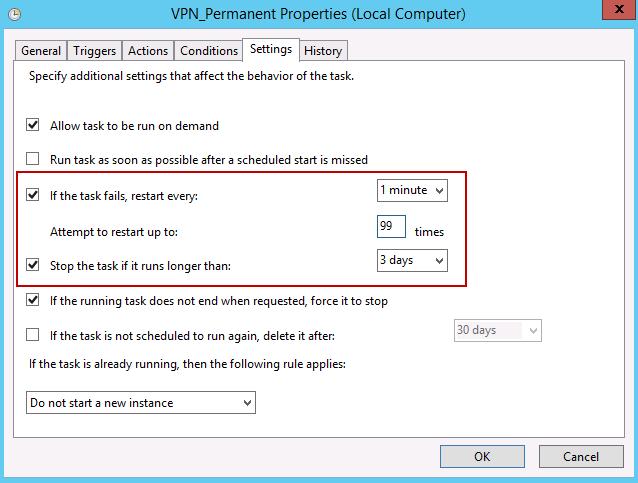
vpn task settings

Note. To make sure if this task works, create another trigger with the Event ID = 10001. This event appears when VPN is disconnected manually. After that, try to disconnect the VPN manually. The connection will be restored immediately.

That’s all.

Note. The methods described above are also applicable to Windows 7

1 comment
0
Facebook Twitter Google + Pinterest
previous post
SCCM and WMI Query to Find All Laptops and Desktops
next post
Configuring Remote Control in SCCM 2012

Related Reading

Zabbix: How to Get Data from PowerShell Scripts

October 27, 2023

Tracking Printer Usage with Windows Event Viewer Logs

October 19, 2023

How to Use Ansible to Manage Windows Machines

September 25, 2023

Installing Language Pack in Windows 10/11 with PowerShell

September 15, 2023

How to View and Change BIOS (UEFI) Settings...

September 13, 2023

1 comment

George January 25, 2018 - 8:14 pm

Thanks SO much for this guide. After upgrading from W7 to W10, this was bugging the hell out of me. Thank to this, I was even able to create a “VPN Alternate” task, which looks for an 809 Error Code (ERROR_VPN_TIMEOUT aka VPN server unresponsive) in the Event Log and then dial an alternate VPN server. I simply created the same Tricky Task as above, but edited this line of the XML query:
*[EventData[Data[4]=’829′ or ‘629’]]

…to this:
*[EventData[Data[4]=’809′]]

Reply

Leave a Comment Cancel Reply

Categories

  • Active Directory
  • Group Policies
  • Exchange Server
  • Microsoft 365
  • Azure
  • Windows 11
  • Windows 10
  • Windows Server 2022
  • Windows Server 2019
  • Windows Server 2016
  • PowerShell
  • VMWare
  • Hyper-V
  • Linux
  • MS Office

Recent Posts

  • Zabbix: How to Get Data from PowerShell Scripts

    October 27, 2023
  • Tracking Printer Usage with Windows Event Viewer Logs

    October 19, 2023
  • PowerShell: Configure Certificate-Based Authentication for Exchange Online (Azure)

    October 15, 2023
  • Reset Root Password in VMware ESXi

    October 12, 2023
  • How to Query and Change Teams User Presence Status with PowerShell

    October 8, 2023
  • How to Increase Size of Disk Partition in Ubuntu

    October 5, 2023
  • How to Use Ansible to Manage Windows Machines

    September 25, 2023
  • Installing Language Pack in Windows 10/11 with PowerShell

    September 15, 2023
  • Configure Email Forwarding for Mailbox on Exchange Server/Microsoft 365

    September 14, 2023
  • How to View and Change BIOS (UEFI) Settings with PowerShell

    September 13, 2023

Follow us

  • Facebook
  • Twitter
  • Telegram
Popular Posts
  • Unable to Connect Windows 10 Shared Printer to Windows XP
  • How to Configure a Slideshow Screensaver Using GPO
  • How to Install and Configure TFTP Server and Client on Windows
  • Windows 10: WSUS Error 0x8024401c
  • Recovering Files from a RAW Partition using TestDisk
  • Virtual Secure Mode (VSM) in Windows 10 Enterprise
  • How to Clear Windows Event Logs Using PowerShell or Wevtutil
Footer Logo

@2014 - 2023 - Windows OS Hub. All about operating systems for sysadmins


Back To Top