Windows Defender Antivirus is Microsoft’s free built-in antivirus that comes installed by default on Windows Server 2016 and 2019 (since Windows 10 2004 the name Microsoft Defender is used). In this article we’ll look at the features of Windows Defender on Windows Server 2019/2016.
- Enable Windows Defender GUI on Windows Server
- How to Uninstall Windows Defender Antivirus on Windows Server 2019 and 2016?
- Managing Windows Defender Antivirus with PowerShell
- How to Exclude Files and Folder from Windows Defender Antivirus Scans?
- Get Windows Defender Status Reports from Remote Computers via PowerShell
- Updating Windows Defender Antivirus Definitions
- Configure Windows Defender Using Group Policy
Enable Windows Defender GUI on Windows Server
Windows Server 2016 and 2019 (including the Core edition) have the Windows Defender Antivirus engine built in. You can check if Windows Defender Antivirus is installed using PowerShell:
Get-WindowsFeature | Where-Object {$_. name -like "*defender*"} | ft Name,DisplayName,Installstate

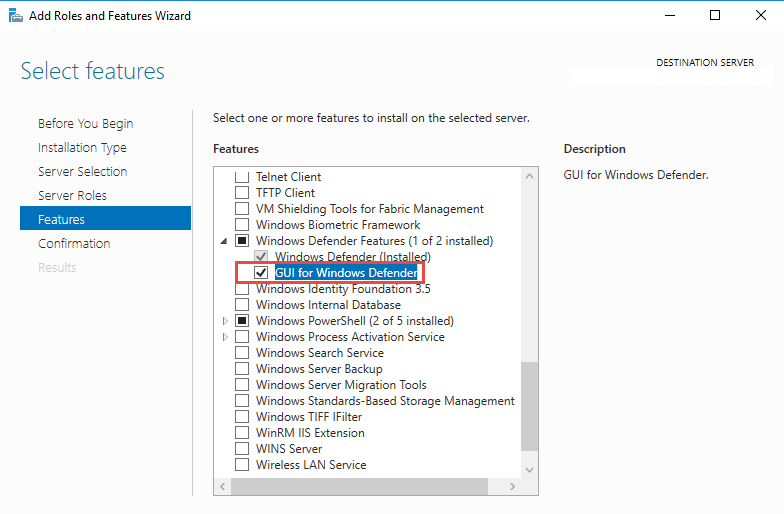
However, there is no Windows Defender Antivirus GUI in Windows Server 2016 by default. You can install the Windows Defender graphical interface on Windows Server 2016 through the Server Manager console (Add Roles and Features -> Features -> Windows Defender Features -> GUI for Windows Defender feature).
Or, you can enable the Windows Defender antivirus GUI using PowerShell:
Install-WindowsFeature -Name Windows-Defender-GUI
To uninstall the Defender GUI, the following PowerShell command is used:
Uninstall-WindowsFeature -Name Windows-Defender-GUI
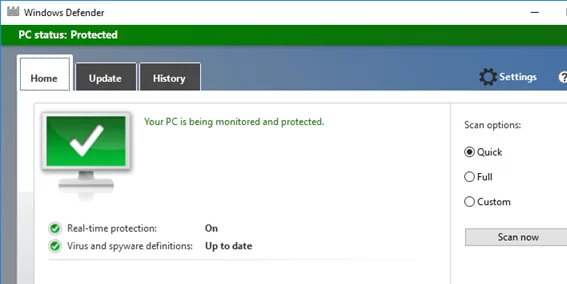
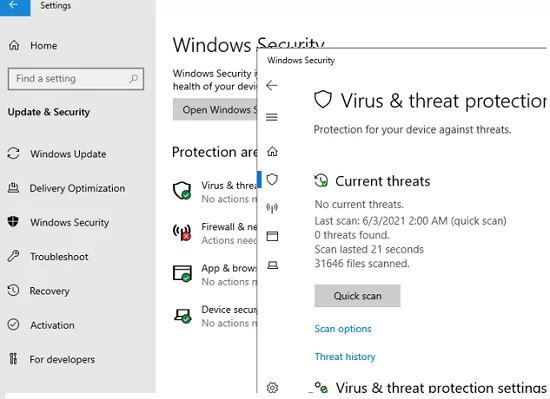
In Windows Server 2019, the Defender GUI is based on the APPX application and is accessible through the Windows Security app (Settings -> Update and Security ).
Windows Defender is configured through the “Virus and threat protection” menu.
You’ll need a new app to open this windowsdefender”, you need to re-register the APPX application using the manifest file with the following PowerShell command:Add-AppxPackage -Register -DisableDevelopmentMode "C:\Windows\SystemApps\Microsoft.Windows.SecHealthUI_cw5n1h2txyewy\AppXManifest.xml"
If the UWP (APPX) app is completely removed, you can restore it manually, similar to restoring the Microsoft Store application.

How to Uninstall Windows Defender Antivirus on Windows Server 2019 and 2016?
In Windows 10, when you install any third-party antivirus (McAfee, Norton, Avast, Kaspersky, Symantec, etc.), the built-in Windows Defender antivirus is disabled. However, it doesn’t happen in Windows Server. You have to disable the built-in antivirus engine manually (in most cases, it is not recommended to use several antivirus programs at a time on one computer or server).
You can uninstall Windows Defender in Windows Server 2019/2016 using Server Manager or with the following PowerShell command:
Uninstall-WindowsFeature -Name Windows-Defender
Do not uninstall Windows Defender if there is no other antivirus on the server.
Add-WindowsFeature Windows-Defender-Features,Windows-Defender-GUI

Managing Windows Defender Antivirus with PowerShell
Let’s consider typical PowerShell commands that you can use to manage Windows Defender Antivirus.
You can make sure if Windows Defender Antivirus service is running using this PowerShell command:
Get-Service WinDefend

As you can see, the service is started (Status – Running)
You can display the current status and settings of Defender using the following cmdlet:
Get-MpComputerStatus
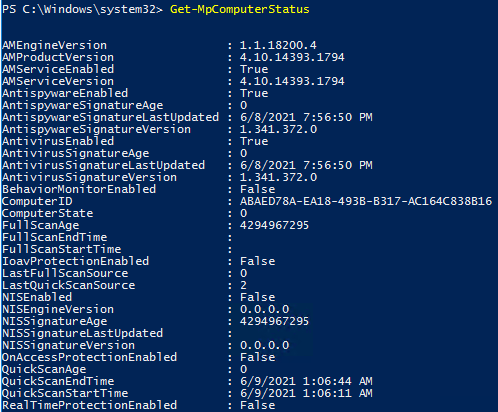
The cmdlet displays the version and the date of the latest antivirus database update (AntivirusSignatureLastUpdated, AntispywareSignatureLastUpdated), enabled antivirus components, the time of the last scan (QuickScanStartTime), etc.
You can disable Windows Defender real time protection as follows:
Set-MpPreference -DisableRealtimeMonitoring $true
After executing this command, the antivirus will not scan in real time all files that are opened by the operating system or users.
Set-MpPreference -DisableRealtimeMonitoring $false
For example, you need to enable scanning for external USB storage devices. Get the current settings with command:
Get-MpPreference | fl disable*
If the USB drive scanning is disabled (DisableRemovableDriveScanning = True), you can enable the scan using the command:
Set-MpPreference -DisableRemovableDriveScanning $false
A complete list of PowerShell cmdlets in the Windows Defender module can be displayed with the command:
Get-Command -Module Defender
How to Exclude Files and Folder from Windows Defender Antivirus Scans?
You can set the list of exclusions – these are names, file extensions, directories to be excluded from the automatic Windows Defender Antivirus scan. The peculiarity of Windows Defender in Windows Server 2019/2016 is the automatically generated list of exclusions applied depending on the installed Windows Server roles and features.
For example, if the Hyper-V role is installed, the following object will be added to the Defender exclusion list: virtual and differencing disks, VHDS disks (*.vhd, *.vhdx, *.avhd), snapshots, Hyper-V folders and processes (Vmms. exe, Vmwp.exe).
If you want to disable Microsoft Defender automatic exclusions on Windows Server, run the command:
Set-MpPreference -DisableAutoExclusions $true
To add the specific directories to the antivirus exclusion list manually, run this command:
Set-MpPreference -ExclusionPath "C:\ISO", "C:\VM", "C:\Nano"
To exclude antivirus scanning of certain processes use the following command:
Set-MpPreference -ExclusionProcess "vmms.exe", "Vmwp.exe"
Get Windows Defender Status Reports from Remote Computers via PowerShell
You can get the Microsoft Defender Antivirus status from remote computers using PowerShell. The following simple script will find all Windows Server hosts in the AD domain and get the Defender state through WinRM (using the Invoke-Command cmdlet):
$Report = @()
 $servers= Get-ADComputer -Filter 'operatingsystem -like "*server*" -and enabled -eq "true"'| Select-Object -ExpandProperty Name
 foreach ($server in $servers) {
 $defenderinfo= Invoke-Command $server -ScriptBlock {Get-MpComputerStatus | Select-Object -Property Antivirusenabled,RealTimeProtectionEnabled,AntivirusSignatureLastUpdated,QuickScanAge,FullScanAge}
 If ($defenderinfo) {
 $objReport = [PSCustomObject]@{
 User = $defenderinfo.PSComputername
 Antivirusenabled = $defenderinfo.Antivirusenabled
 RealTimeProtectionEnabled = $defenderinfo.RealTimeProtectionEnabled
 AntivirusSignatureLastUpdated = $defenderinfo.AntivirusSignatureLastUpdated
 QuickScanAge = $defenderinfo.QuickScanAge
 FullScanAge = $defenderinfo.FullScanAge
 }
 $Report += $objReport
 }
 }
 $Report|ft

To get information about antivirus detections, you can use the following PowerShell script:
 $Report = @()
 $servers = Get-ADComputer -Filter 'operatingsystem -like "*server*" -and enabled -eq "true"'| Select-Object -ExpandProperty Name
 foreach ($server in $servers) {
 $defenderalerts= Invoke-Command $server -ScriptBlock {Get-MpThreatDetection | Select-Object -Property DomainUser,ProcessName,InitialDetectionTime ,CleaningActionID,Resources }
 If ($defenderalerts) {
 foreach ($defenderalert in $defenderalerts) {
 $objReport = [PSCustomObject]@{
 Computer = $defenderalert.PSComputername
 DomainUser = $defenderalert.DomainUser
 ProcessName = $defenderalert.ProcessName
 InitialDetectionTime = $defenderalert.InitialDetectionTime
 CleaningActionID = $defenderalert.CleaningActionID
 Resources = $defenderalert.Resources
 }
 $Report += $objReport
 }
 }
 }
 $Report|ft
The report shows the name of the infected file, the action performed, the user, and the owner process.

Updating Windows Defender Antivirus Definitions
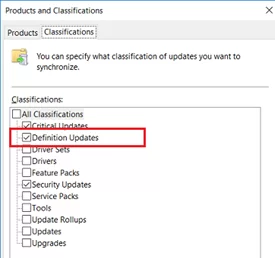
Windows Defender Antivirus can automatically update online from Windows Update servers. If there is an internal WSUS server in your network, the Microsoft antivirus can receive updates from it. You just need to make sure that the installation of updates has been approved on your WSUS server (Windows Defender Antivirus updates are called Definition Updates in the WSUS console), and clients are targeted to the correct WSUS server using GPO.
In some cases, Windows Defender may work incorrectly after getting a broken update. Then it is recommended to reset current definitions database and download them again:
"%PROGRAMFILES%\Windows Defender\MPCMDRUN.exe" -RemoveDefinitions -All
 "%PROGRAMFILES%\Windows Defender\MPCMDRUN.exe" –SignatureUpdate
If your Windows Server does not have direct access to the Internet, you can update Microsoft Defender from a network folder.
Download Windows Defender updates manually (https://www.microsoft.com/en-us/wdsi/defenderupdates) and place them to a shared network folder. Set the path to the shared folder with Defender updates:
Set-MpPreference -SignatureDefinitionUpdateFileSharesSources \\mun-fs01\Defender
Run the antivirus definition update:
Update-MpSignature -UpdateSource FileShares
Configure Windows Defender Using Group Policy
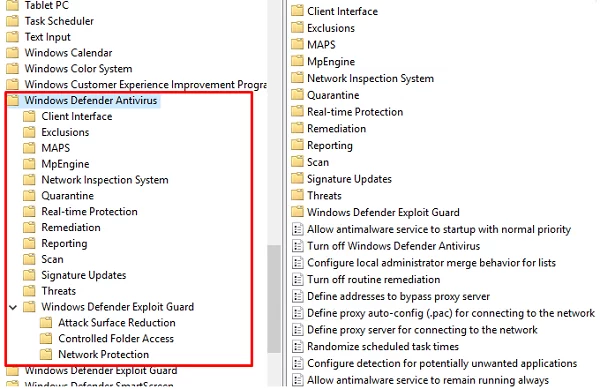
You can manage basic Microsoft Defender settings on computers and servers using Group Policy. Use the following GPO section: Computer Configurations -> Administrative Template -> Windows Component -> Windows Defender Antivirus.
This section provides over 100 different options for managing Microsoft Defender settings.
For example, to completely disable your antivirus, you must enable the GPO parameter “Turn off Windows Defender Antivirus”.
More information on the available Defender Group Policy settings can be found here. https://docs.microsoft.com/en-us/microsoft-365/security/defender-endpoint/use-group-policy-microsoft-defender-antivirus
Windows Defender centralized management is available via the Advanced Threat Protection on the Azure Security Center (ASC) portal with a paid subscription (about $15 per host/month).