You can use the Windows Server Update Services (WSUS) update server to deploy Microsoft product updates (Windows, Office, SQL Server, Exchange, etc.) to computers and servers in the company’s local network. In this article, we’ll walk you through how to install and configure the WSUS update server on Windows Server 2022/2019/2016, or 2012 R2.
How does WSUS work?
The WSUS server is implemented as a separate Windows Server role. In general terms, the WSUS service can be described as follows:
- After installation, the WSUS server is scheduled to synchronize with Microsoft Update servers on the Internet and download new updates for selected products;
- The WSUS administrator selects which updates to install on company workstations and servers and approves their installation;
- WSUS clients (computers) on the local network download and install updates from your update server according to configured update policies.
How to Install WSUS Role on Windows Server 2016/2016/2012R2?
Starting with Windows Server 2008, WSUS is a separate role that can be installed through the Server Management console or using PowerShell.
To install WSUS, open the Server Manager console and check the Windows Server Update Services role (the system will automatically select and offer to install the necessary IIS web server components).
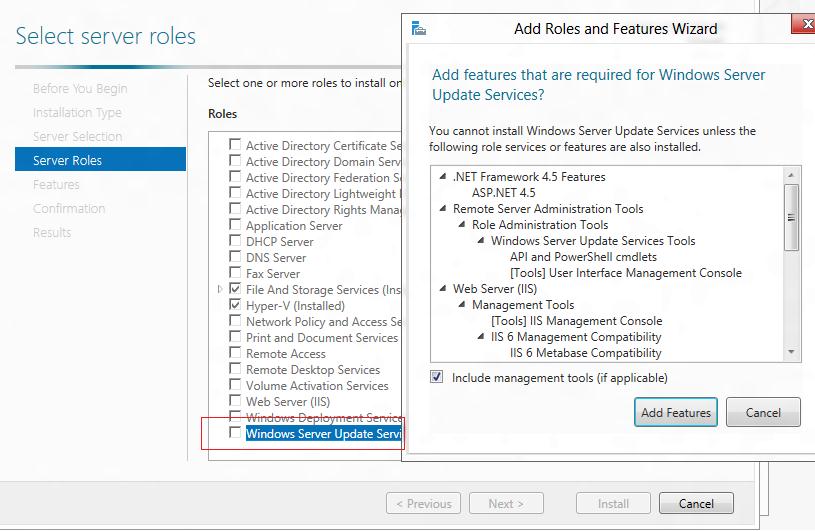
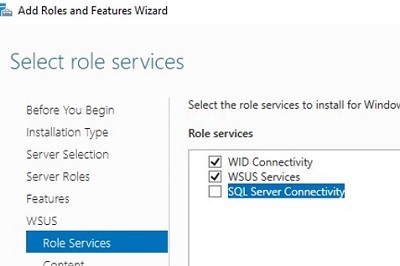
In the next window, choose which WSUS role services you want to install. Be sure to check the WSUS Services option. The next two options depend on which SQL database you plan to use for WSUS.
Server settings, update metadata, and WSUS client information are stored in a SQL Server database. As a WSUS database you can use:
- Windows Internal Database (WID) – built-in Windows database (WID Connectivity option). This is the recommended and workable option even for large infrastructures;
- A separate Microsoft SQL Server database is deployed on a local or remote server. You can use MS SQL Enterprise, Standard (licensing required), or the free Express edition. This is the SQL Server Connectivity option.
The Windows Internal Database) is recommended if:
- You don’t have unused MS SQL Server licenses;
- You are not planning to use WSUS load balancing (NLB WSUS)
- When deploying a downstream (child) WSUS server (for example, in branch offices). In this case, it is recommended to use the built-in WSUS database on secondary servers.
If you install the WSUS role and the MS SQL database on different servers, there are some limitations:
- SQL Server with WSUS database cannot be an Active Directory domain controller;
- The WSUS server cannot be deployed on a host with the Remote Desktop Services role.
The default WID database is called SUSDB.mdf and is stored in the folder %windir%\wid\data. This database supports only Windows authentication (not SQL). The internal (WID) database instance for WSUS is called server_name\Microsoft##WID.
The WSUS WID database can be administered through SQL Server Management Studio (SSMS) if you specify the following connection string: \\.\pipe\MICROSOFT##WID\tsql\query.
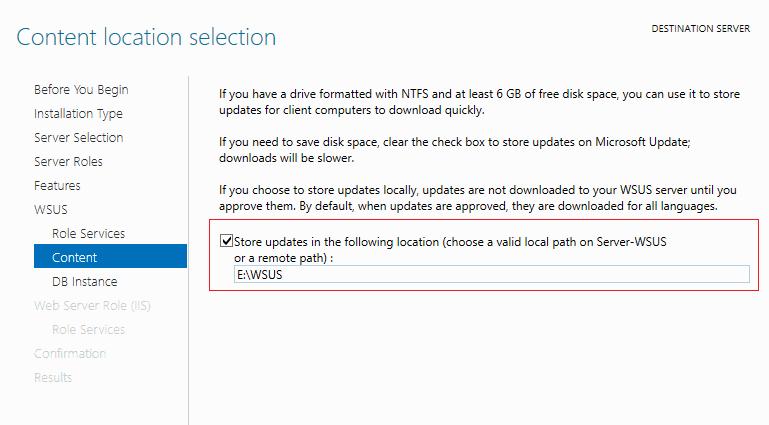
If you do not have enough disk space to store update files, disable this option. In this case, WSUS clients will receive approved update files from the Internet (a viable option for small networks).
If you want to store update files locally on the WSUS server, enable the option Store updates in the following locations and specify the directory path. This can be a folder on a local disk (a separate physical or logical volume is recommended), or a network location (UNC path). Updates are downloaded to the specified directory only after they have been approved by the WSUS administrator.
If you do not have enough disk space to store update files, disable this option. In this case, WSUS clients will receive approved update files from the Internet (a viable option for small networks).
You can also install a WSUS server with an internal database (WID) using the following PowerShell command:
Install-WindowsFeature -Name UpdateServices, UpdateServices-WidDB, UpdateServices-Services, UpdateServices-RSAT, UpdateServices-API, UpdateServices-UI -IncludeManagementTools
Initial WSUS Configuration on Windows Server
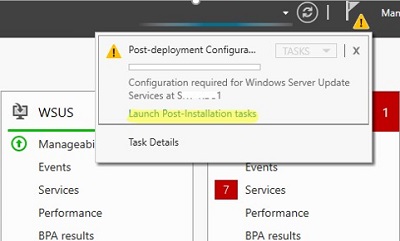
After you finish installing the WSUS role, you need to complete its initial configuration. Open Server Manager and select Post-Deployment Configuration -> Launch Post-Installation tasks.
CD "C:\Program Files\Update Services\Tools"
 WsusUtil.exe PostInstall CONTENT_DIR=D:\WSUS
Or, for example, you can switch your WSUS to an external SQL Server database:
wsusutil.exe postinstall SQL_INSTANCE_NAME="MUN-SQL1\WSUSDB" CONTENT_DIR=D:\WSUS_Content
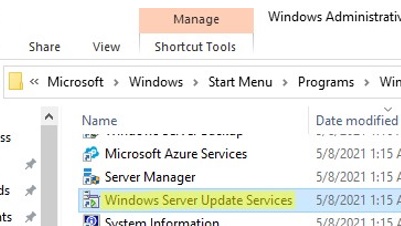
Then open the Windows Server Update Services console. The WSUS Update Server Initial Configuration Wizard starts.
Specify whether the WSUS server will download updates from the Microsoft Update site directly (Synchronize from Microsoft Update) or if it should receive them from an upstream WSUS server (Synchronize from another Windows Update Services server). Downstream WSUS servers are usually deployed at remote sites with a large number of clients (300+) to reduce the load on the WAN link.

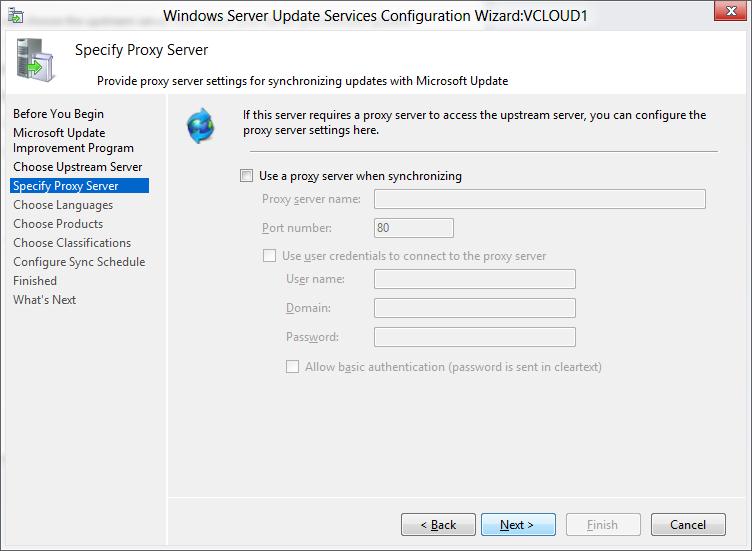
If your access the Internet through a proxy server, you need to specify the address and port of the proxy server, as well as authentication credentials.
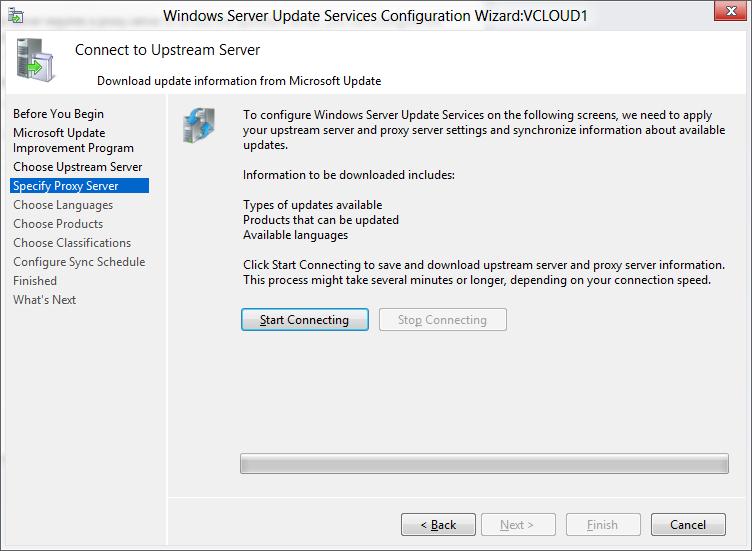
Next, check the connection to the upstream update server (or Windows Update). Click Start Connecting.
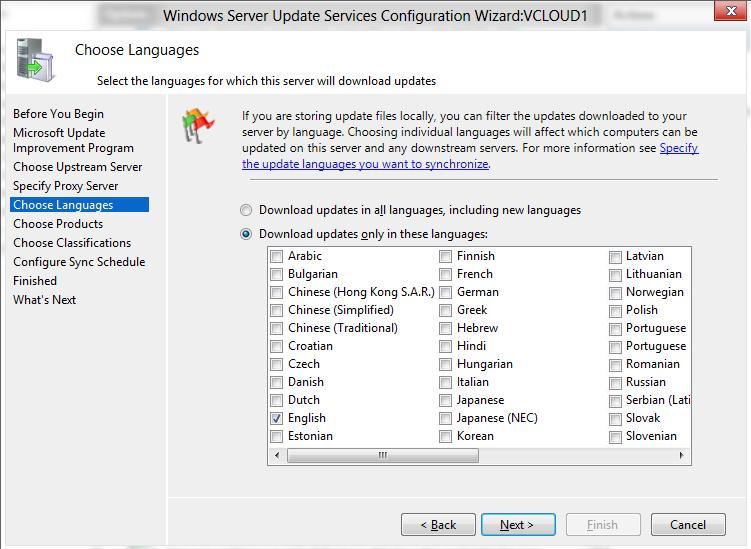
Then you need to select the product languages for which WSUS will download updates. We select English (the list of the languages can further be changed from the WSUS console).
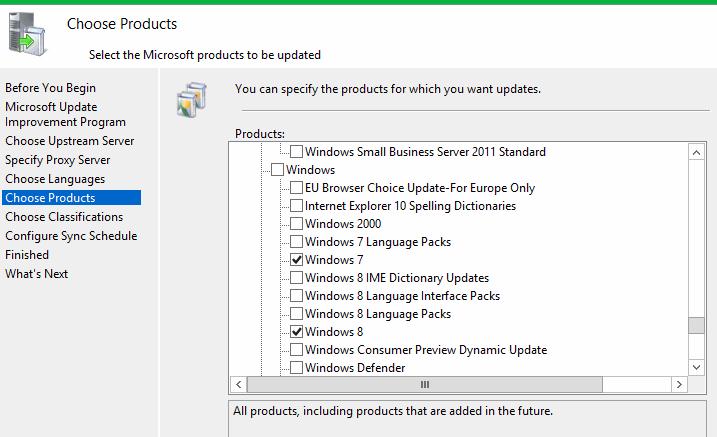
Then specify the list of products for which the WSUS should download updates. Select only those Microsoft products that are used in your environment. For example, if you are sure that there are no Windows 7 or Windows 8 computers left on your network, don’t select these options. This will significantly save space on the WSUS server drive.
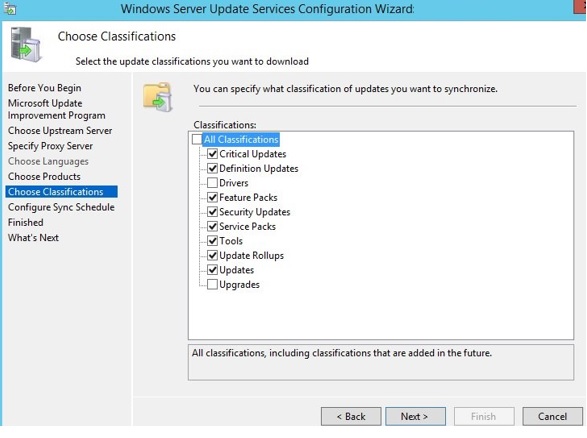
Be sure to include the following general sections in the WSUS classification:
- Developer Tools, Runtimes, and Redistributable — used to update Visual C++ Runtime libraries;
- Windows Dictionary Updates in the Windows category;
- Windows Server Manager – Windows Server Update Services (WSUS) Dynamic Installer.
On the Classification Page, you need to specify the types of updates to be deployed via WSUS. It is recommended to select: Critical Updates, Definition Updates, Security Packs, Service Packs, Update Rollups, and Updates.
Configure your update synchronization schedule. It is recommended to use the automatic daily synchronization of the WSUS server with Microsoft Update servers. The WSUS synchronization should be performed at night, in order not to impact the Internet channel during business hours.
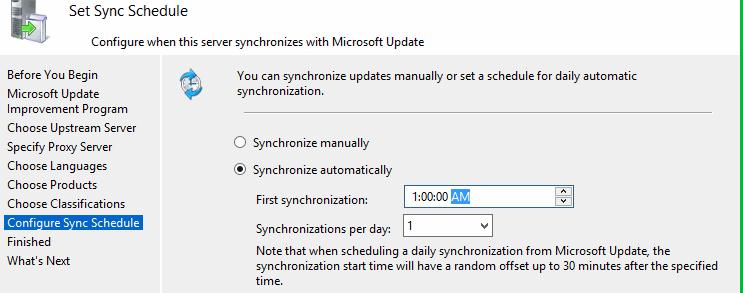
The initial synchronization of the WSUS server with the upstream update server may take up to several days, depending on the number of products you chose earlier and your ISP.
After the wizard is done, the WSUS console will start.

There are several sections in the WSUS console tree:
- Updates – available updates on the WSUS server (here you can manage the update approvals and assign them for installation);
- Computers – here you can manage WSUS client groups (computers, servers, test, and production groups, etc.);
- Downstream Servers – allows you to configure whether you receive from Windows Update or an upstream WSUS server;
- Synchronizations – update synchronization schedule;
- Reports –different WSUS reports;
- Options –WSUS configuration settings.
Clients can now receive updates by connecting to the WSUS server on port 8530 (in Windows Server 2003 and 2008, port 80 is used by default). Check that this port is open on the WSUShost:
Test-NetConnection -ComputerName yourwsushost1 -Port 8530
If the port is closed, create an allow rule in Windows Defender Firewall.
How to Install WSUS Management Console on Windows 10 and 11?
You use the Windows Server Update Services console (wsus.msc) to manage WSUS. You can manage WSUS hosts either using the local console or over the network from a remote computer.
The WSUS Administration Console for Windows 10 or 11 is installed from the Remote Server Administration Tools (RSAT). To install the Rsat.WSUS.Tool component, run the following PowerShell command:
Add-WindowsCapability -Online -Name Rsat.WSUS.Tools~~~~0.0.1.0
If you want to install the WSUS console on Windows Server, use the command:
Install-WindowsFeature -Name UpdateServices-Ui
When you install WSUS on Windows Server, two additional local groups are created. You can use them to grant users access to the WSUS management console.
- WSUS Administrators
- WSUS Reporters
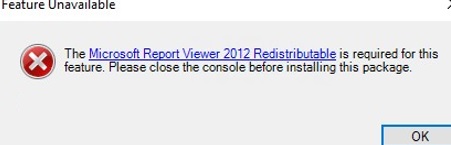
To view reports about updates and clients on WSUS, you must install:
- Microsoft System CLR Types for SQL Server 2012 (SQLSysClrTypes.msi);
- Microsoft Report Viewer 2012 Runtime (ReportViewer.msi).
If these components are not installed, then when generating any WSUS report, an error will appear:
The Microsoft Report Viewer 2012 Redistributable is required for this feature. Please close the console before installing this package.
Optimizing WSUS Performance
This section describes a few tips for optimizing the performance of the WSUS Update Server in a real-world environment.
- For WSUS to work properly, the update host must have at least 4 GB of RAM and 2CPU free;
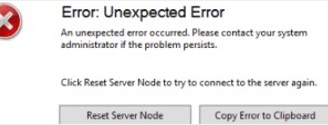
- With a large number of WSUS clients (more than 1500), you may experience significant performance degradation of the IIS WsusPoll pool that distributes updates to clients. Error 0x80244022 may appear on clients, or when starting the WSUS console, it may crash with an error Error: Unexpected Error + Event ID 7053 in the Event Viewer (
The WSUS administration console has encountered an unexpected error. This may be a transient error; try restarting the administration console. If this error persists). To resolve this issue, you need to add more RAM to your WSUS host and optimize your IIS pool settings as recommended in the article. Use these PowerShell commands:
Import-Module WebAdministration
 Set-ItemProperty -Path IIS:\AppPools\WsusPool -Name queueLength -Value 2500
 Set-ItemProperty -Path IIS:\AppPools\WsusPool -Name cpu.resetInterval -Value "00.00:15:00"
 Set-ItemProperty -Path IIS:\AppPools\WsusPool -Name recycling.periodicRestart.privateMemory -Value 0
Set-ItemProperty -Path IIS:\AppPools\WsusPool -Name failure.loadBalancerCapabilities -Value "TcpLevel" - Enable automatic approval for Microsoft antivirus signature/definition updates. Otherwise, WSUS can slow down significantly and consume all available RAM.
Antivirus checks can negatively impact WSUS performance. In the built-in Microsoft Defender Antivirus in Windows Server, it is recommended to exclude the following folders from the Real-time protection scope:
- \WSUS\WSUSContent;
- %windir%\wid\data;
- \SoftwareDistribution\Download.
Stay tuned!