You can use PowerShell’s features to create ZIP archives and extract them. In PowerShell 5.0 (this PowerShell version is installed by default on Windows 10), a separate module Microsoft.PowerShell.Archive is available. On older versions of Windows, you can use the ZipFile class from the .NET Framework for archiving.
There are only two cmdlets in the Microsoft.PowerShell.Archive module (C:\Windows\System32\WindowsPowerShell\v1.0\Modules\Microsoft.PowerShell.Archive):
- Compress-Archive
- Expand-Archive
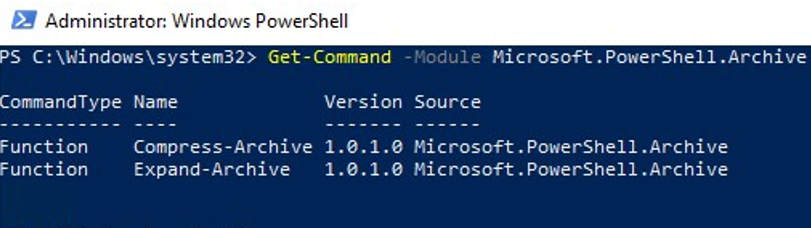
Get-Command -Module Microsoft.PowerShell.Archive | Format-Table -AutoSize
CommandType Name             Version Source
----------- ----             ------- ------
Function    Compress-Archive 1.0.1.0 Microsoft.PowerShell.Archive
Function    Expand-Archive   1.0.1.0 Microsoft.PowerShell.Archive
Let’s look at examples of using these cmdlets to create and extract ZIP archives in your PowerShell scripts.
PowerShell: Create ZIP Archives with Compress-Archive
The Compress-Archive command has the following syntax:
Compress-Archive [-Path] String[] [-DestinationPath] String [-CompressionLevel String ] [-Update]
- The Path parameter is used to specify the path to the files or folders to be archived;
- DestinationPath – specifies the path to the ZIP file;
- CompressionLevel – sets the compression level (
NoCompression,OptimalorFastest); - Update – allows you to add (update) files in an existing ZIP archive;
- Force – if an archive with the specified name already exists, it will be overwritten.
- Optimal — optimization by the level of compression;
- Fastest — optimization by the time taken;
- NoCompression — without any compression.
The NoCompression option should be used when archiving already compressed files (jpg, msi, mp3, etc.) into a single ZIP file. In this case, Windows will not waste CPU time compressing them.
To zip a single file, run:
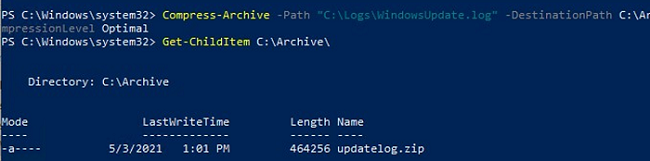
Compress-Archive -Path "C:\Logs\WindowsUpdate.log" -DestinationPath C:\Archive\updatelog.zip -CompressionLevel Optimal
You can zip the entire contents of multiple folders (including all files and nested folders):
Compress-Archive -Path C:\Logs\,C:\Logs2\ -DestinationPath C:\Archive\logs-all.zip -CompressionLevel Optimal
You can add to ZIP archive only files with a specific mask. For example, the following command will zip only *.txt files.
Compress-Archive -Path C:\Logs\*.txt -DestinationPath C:\Archive\logs-txt.zip –CompressionLevel Fastest
More complex filters can be used with the Get-ChildItem cmdlet. For example, the following script will allow you to find the top 10 largest files with the *.docx or *.xlsx extensions on the disk and add them to the archive:
Get-ChildItem c:\share\ITdept -Include *.xlsx –Recurse| sort -descending -property length | select -first 10 |Compress-Archive -DestinationPath C:\backup\itdeptdocs.zip
To add new files to an existing zip archive, use the Update key:
Compress-Archive -Path C:\Logs\,C:\logs2\ –Update -DestinationPath C:\Archive\logs-txt.zip

Exception calling "Write" with "3" argument(s): "Stream was too long."
At  C:\Windows\system32\WindowsPowerShell\v1.0\Modules\Microsoft.PowerShell.Archive\Microsoft.PowerShell.Archive.psm1:805
char:29
+ ...                     $destStream.Write($buffer, 0, $numberOfBytesRead)
+                         ~~~~~~~~~~~~~~~~~~~~~~~~~~~~~~~~~~~~~~~~~~~~~~~~~
+ CategoryInfo          : NotSpecified: (:) [], MethodInvocationException
+ FullyQualifiedErrorId : IOException
How to Extract a ZIP File with Expand-Archive?
You can use the Expand-Archive cmdlet to unzip ZIP files. The syntax for the cmdlet is similar:
Expand-Archive [-Path] String [-DestinationPath] String [-Force] [-Confirm]
For example, to unpack the ZIP archive we created earlier into the specified folder and overwrite the files:
Expand-Archive -Path C:\archive\logs-all.zip -DestinationPath c:\logs -Force

Disadvantages of the Microsoft.PowerShell.Archive module:
- You cannot view the contents of the archive without extracting it;
- You cannot extract some of the files from the archive (you will have to extract the entire archive file);
- You cannot use other archive formats, except zip;
- You won’t be able to protect a ZIP archive with a password.
You can install the 7Zip4Powershell module and extract a password protected zip file as follows:
Install-Module -Name 7Zip4Powershell
 Expand-7Zip -ArchiveFileName C:\Archive\Logs.zip -Password "p@ssd0rw" -TargetPath C:\Share\Logs
Working with Compressed Files with the PowerShell ZipFile Class
In earlier Windows version (prior to Windows 10 or Windows Server 2016 with PowerShell version < 5.0 (if you cannot upgrade the PowerShell version), you can use a separate ZipFile class (from NET Framework 4.5) to create zip archives.
First, load the class into your PowerShell session:
Add-Type -AssemblyName "System.IO.Compression.FileSystem"
To archive a folder, use a PS script like this:
$SourceFolder = 'C:\Logs'
 $ZipFileName = 'C:\PS\logs.zip'
 [IO.Compression.ZipFile]::CreateFromDirectory($SourceFolder, $ZipFileName)
![[IO.Compression.ZipFile]::CreateFromDirectory .net class to create zip archive](https://woshub.com/wp-content/uploads/2016/03/io-compression-zipfilecreatefromdirectory-net.png)
In order to update the ZIP archive and set the compression ratio, use the following PowerShell code:
$addfile = ‘C:\temp\new.log’
 $compressionLevel = [System.IO.Compression.CompressionLevel]::Fastest
 $zip = [System.IO.Compression.ZipFile]::Open($zipFileName, 'update')[System.IO.Compression.ZipFileExtensions]::CreateEntryFromFile($zip, $addfile, (Split-Path $addfile -Leaf), $compressionLevel)
 $zip.Dispose()
$zip.Dispose() command is used to close the zip file.You can list the contents of the ZIP archive:
[System.IO.Compression.ZipFile]::OpenRead($zipFileName).Entries.Name

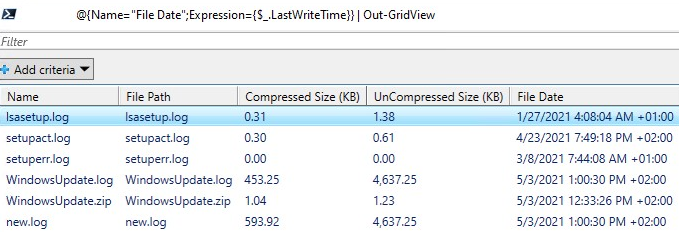
Or you can display the contents of the zip archive as an Out-GridView table with additional info (size of compressed/uncompressed files, last write time, etc.):
$ZipFileName = "C:\PS\logs1.zip"
 $Stream = New-Object IO.FileStream($ZipFileName , [IO.FileMode]::Open)
 $ZipArchive = New-Object IO.Compression.ZipArchive($Stream)
 $ZipArchive.Entries |
 Select-Object Name,
 @{Name="File Path";Expression={$_.FullName}},
 @{Name="Compressed Size (KB)";Expression={"{0:N2}" -f($_.CompressedLength/1kb)}},
 @{Name="UnCompressed Size (KB)";Expression={"{0:N2}" -f($_.Length/1kb)}},
 @{Name="File Date";Expression={$_.LastWriteTime}} | Out-GridView
 $ZipArchive.Dispose()
 $Stream.Close()
 $Stream.Dispose()
To extract the ZIP file to the C:\Logs folder, use the following commands:
$SourceZipFile = 'C:\PS\logs.zip'
 $TargetFolder = 'C:\Logs'
 [IO.Compression.ZipFile]::ExtractToDirectory($SourceZipFile, $TargetFolder)
1 comment
It’s a nice feature in PowerShell, but from my experience this is in practice not so useful. If any file is open in a program or process the zipping will fail. Or then I’m missing some crucial command option.