The Disk Cleanup tool allows the administrator to quickly clean up the Windows Server system drive by deleting unnecessary and temporary files, including cleaning the WinSxS directory from files of outdated components that remained after installing the latest cumulative updates. The Disk Cleanup utility (cleanmgr.exe) is installed by default on the GUI editions of Windows Server 2016/2019 (Desktop Experience). However, in previous versions of Windows Server (2012 R2/2012/2008 R2), the cleanmgr.exe tool is missing.
Using Disk Cleanup Tool on Windows Server 2016
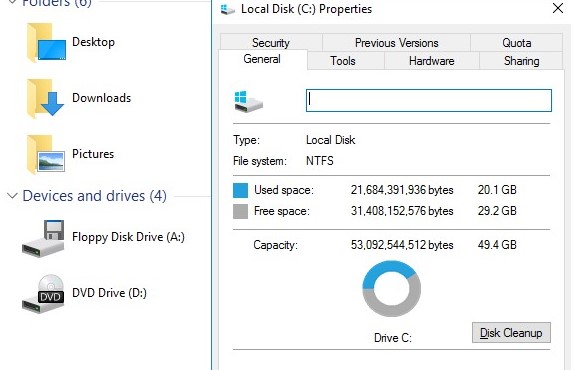
To clean the system disk from unneeded files on Windows Server 2016 using the Disk Cleanup utility, you need to open the disk properties in File Explorer and click the Disk Cleanup button.
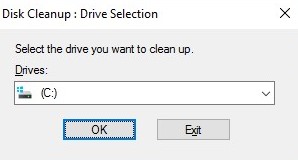
disk cleanup” or cleanmgr.exe in the search box.Select the drive you want to clean.
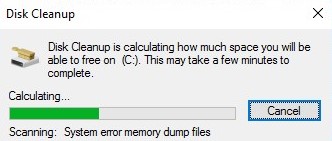
Wait until the cleaning wizard checks your disk and finds unnecessary files that can be safely deleted.
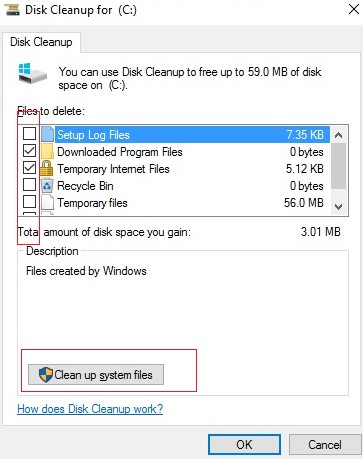
You can select components whose files can be deleted. You are prompted to delete the following temporary files:
- Setup Log Files;
- Downloaded Program Files;
- Temporary Internet Files;
- Recycle Bin;
- Temporary files;
- Thumbnails.
To remove unneeded system files, click on the Clean up system files button.
Additionally, it is proposed to clean up:
- Outdated Windows Defender files;
- System archived Windows Error Reporting files (the folder C:\ProgramData\Microsoft\Windows\WER\ReportQueue);
- System queued Windows Error Reporting;
- Device driver packages (see How to Remove Unused Drives from Driver Store);
- Windows Update Cleanup — this allows you to clean up the component store in the WinSxS directory. Old versions of components files that remain after installing updated ones are removed.
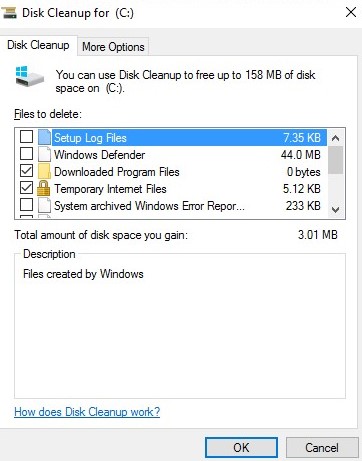
Select the options you need, and Disk Cleanup will show the amount of disk space you gave. Click OK and confirm the deletion of files.
Wait for the cleanmgr.exe tool to remove the unnecessary files.
Cleanmgr.exe: Disk Cleanup Command-Line Options
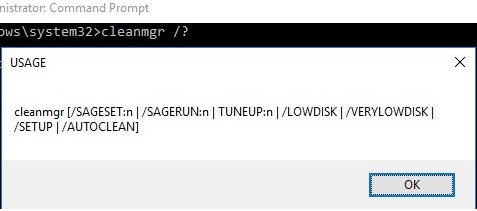
The cleanmgr.exe tool has several command-line options that allow it to be used in various automatic drive cleaning scenarios. They can be used both on Windows Server and on user desktop workstations running Windows 10.
cleanmgr.exe [/d driveletter] [/SAGESET:n | /SAGERUN:n | TUNEUP:n | /LOWDISK | /VERYLOWDISK | /SETUP | /AUTOCLEAN]
The /AUTOCLEAN parameter is used to delete old files left after upgrading a Windows build. The /SETUP option allows you to delete files left from a previous version of Windows (if you performed an in-place upgrade).
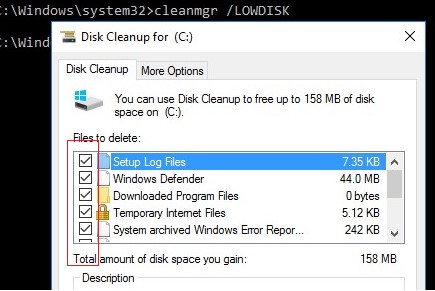
The cleanmgr /LOWDISK command runs the Disk Cleanup GUI with the already selected cleaning options.
The cleanmgr /VERYLOWDISK command performs automatic drive cleanup (without showing GUI), and after the end it displays information about the actions performed and available free space.
You have successfully resolved the low disk space condition. Your C:\ volume now has 10000 Mb of free space remaining.

Using the /sageset:xx and /sagerun:xx options, you can create and run a customized set of cleanup options.
For example, run the command: cleanmgr /sageset: 11. In the window that opens, select the components and files that you want to automatically cleanup (I selected all the options).
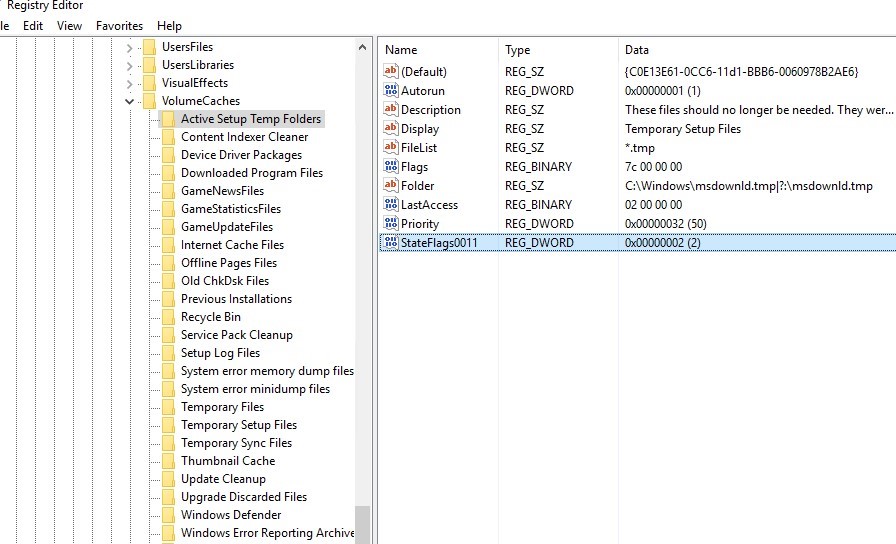
These settings are saved to the registry key HKEY_LOCAL_MACHINE\SOFTWARE\Microsoft\Windows\CurrentVersion\Explorer\VolumeCaches. This registry section lists all the Windows components that can be cleaned using the Disk Cleanup tool. For each option you select, a DWORD parameter is created with the name StateFlags0011 (0011 is the number you specified in the sageset parameter).
To start the drive cleanup task with the selected parameters, run the command:
cleanmgr /sagerun:11
If you need to configure automatic disk cleanup task on computers (or servers) in an Active Directory domain, you just need to export this registry key and deploy it on computers through the GPO.
To automatically cleanup the system drive on workstations with Windows 10, you can create a simple scheduled task with the following PowerShell code:
Start-Process -FilePath CleanMgr.exe -ArgumentList '/sagerun:11' -WindowStyle Hidden -Wait
How to Enable Disk Cleanup on Windows Server 2012 R2/2008 R2 without Installing Desktop Experience?
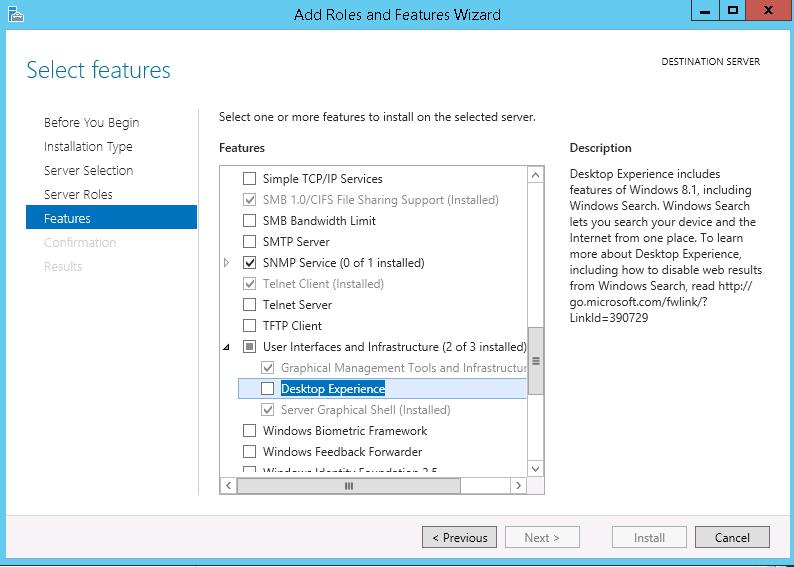
By default, in Windows Server 2012/R2 and 2008/R2 the Disk Cleanup (cleanmgr.exe) tool is not installed by default. To use the cleanmgr utility, first you have to install a separate server Desktop Experience feature using either Server Manager or PowerShell (Install-WindowsFeature Desktop-Experience).
Together with Desktop Experience, many other unnecessary components are installed on the server:
- Windows Media Player;
- Desktop themes;
- AVI support for Windows;
- Windows SideShow;
- Windows Defender Antivirus;
- Disk Cleanup;
- Sync Center;
- Audio recording;
- Character Map;
- Snipping Tool.
To run the Disk Cleanup on Windows Server, you can use a simple method: just copy two files Cleanmgr.exe and Cleanmgr.exe.mui from WinSxS to the system32 directory. Below you can see commands to copy cleanmgr files in different Windows versions (in all cases, the path is used for Windows Server English language editions).
| OS version | Command to copy cleanmgr bin files |
| Windows Server 2008 R2 x64
| copy C:\Windows\winsxs\amd64_microsoft-windows-cleanmgr_31bf3856ad364e35_6.1.7600.16385_none_c9392808773cd7da\cleanmgr.exe C:\Windows\System32\ |
| Windows Server 2008 x64
| copy C:\Windows\winsxs\amd64_microsoft-windows-cleanmgr_31bf3856ad364e35_6.0.6001.18000_none_c962d1e515e94269\cleanmgr.exe C:\Windows\System32\ |
| Windows Server 2012 x64
| copy C:\Windows\WinSxS\amd64_microsoft-windows-cleanmgr_31bf3856ad364e35_6.2.9200.16384_none_c60dddc5e750072a\cleanmgr.exe C:\Windows\System32\ |
Windows Server 2012 R2 x64
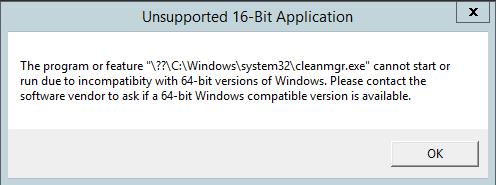
The trick described above doesn’t work on Windows Server 2012 R2 due to the changes made by KB2821895 update. The matter is that after you install this update, compression is used to store the binary component files. When you trying to run the copied cleanmgr.exe, the following error appears:
Unsupported 16-Bit Application

The Program or feature \??\C:\Windows\system32\cleanmgr.exe cannot start or run due to incompatibility with 64-bit version of Windows.
As a workaround, you can use this method:
- Install Desktop Experience feature using PowerShell:
Install-WindowsFeature Desktop-Experience - Restart your server;
- Copy the files %windir%\system32\cleanmgr.exe and %windir%\system32\en-US\cleanmgr.exe.mui to any directory (c:\temp);
- Uninstall the feature:
Uninstall-WindowsFeature Desktop-Experience - Reboot;
- Copy the files cleanmgr.exe and cleanmgr.exe.mui to the directories mentioned above.
Later both of the files can be copied to other servers or integrated into your Windows Server 2012 R2 virtual machine template.
To start the Disk Cleanup tool, run the cleanmgr.exe command with the administrator privileges. 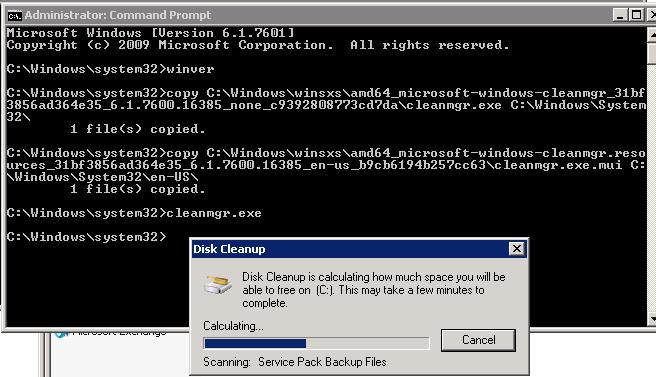
dism.exe /online /Cleanup-Image /StartComponentCleanup /ResetBase
To use cleanmgr.exe to delete old update files on Windows 2008 R2 / Windows 7 SP1, you need to install a separate patch KB2852386.
Using Disk Cleanup on Windows Server Core Edition
In Windows Server Core 2016, which lacks full-fledged GUI capabilities, Disk Cleanup tool is also not installed. If you want to use cleanmgr.exe to clean up the disk on Server Core, just copy the following files from the WinSXS directory:
copy C:\Windows\WinSxS\amd64_microsoft-windows-cleanmgr_31bf3856ad364e35_10.0.14393.0_none_9ab8a1dc743e759a\cleanmgr.exe C:\Windows\System32\copy C:\Windows\WinSxS\amd64_microsoft-windows-cleanmgr.resources_31bf3856ad364e35_10.0.14393.0_en-us_8b4adb68af596a23\cleanmgr.exe.mui C:\Windows\System32\en-US\
3 comments
March 2019 – Had to run the cleanup on 2012 R2 server with desktop experience still installed. Didn’t work with just the files copied.
It works with Windows 2008R2. Thanks a lot. God Bless.
Does not work in Windows Server 2012 x64:
When i execute `copy C:\Windows\WinSxS\amd64_microsoft-windows-cleanmgr_31bf3856ad364e35_6.2.9200.16384_none_c60dddc5e750072a\cleanmgr.exe C:\Windows\System32\`
I get that message:
“C:\>copy C:\Windows\WinSxS\amd64_microsoft-windows-cleanmgr_31bf3856ad364e35_6.2
.9200.16384_none_c60dddc5e750072a\cleanmgr.exe C:\Windows\System32\
Das System kann den angegebenen Pfad nicht finden.
C:\>”
WTF??