Zabbix is an enterprise-level open-source monitoring system. Currently, Zabbix is one of the most popular and powerful free monitoring systems. Due to its simple installation and configuration, Zabbix may be used to monitor large infrastructures with hundreds of hosts, as well as small configurations. In this article we’ll show you how to install and configure basic features of a Zabbix server 5.0 with a web interface on Linux Ubuntu and CentOS, and how to install Zabbix agent on a server running Windows or Linux and add new hosts for monitoring.
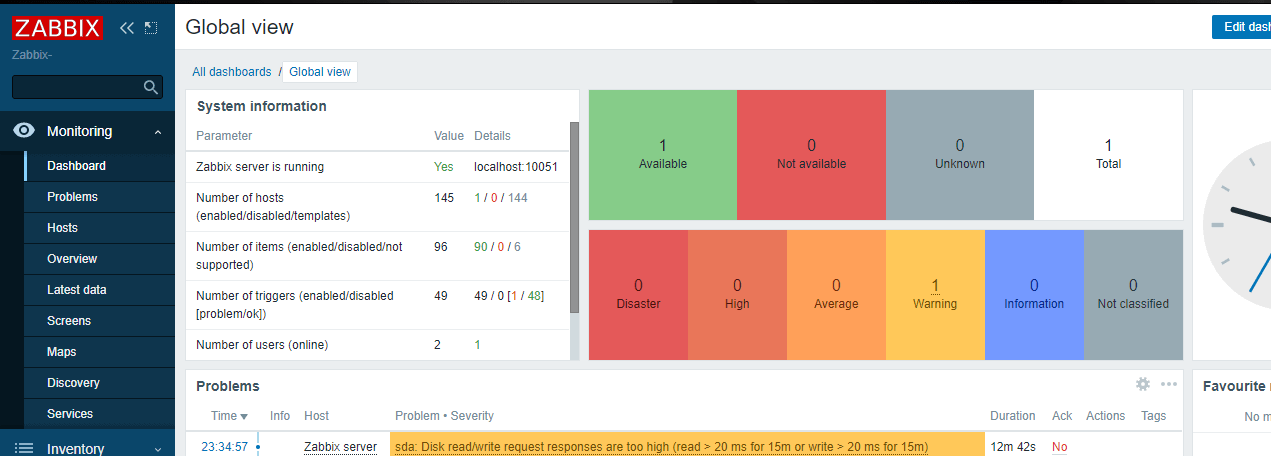
You can see the Zabbix server dashboard interface on a screenshot below.
Simple and easy-to-configure Zabbix is written on C (a server, a proxy, and an agent) and PHP (frontend). Zabbix Server and Zabbix Proxy work in Linux systems only. The Zabbix agent can be installed on a wide variety of supported operating systems and platforms.
Zabbix server installation consists of:
- A zabbix_server binary (usually, it is working as a service);
- MySQL/MariaDB/PostgreSQL database;
- Apache2/Nginx web server with a PHP handler;
- Frontend site files (.php, .js, .css, etc.).
Usually, the operating scheme looks like this:
- A Zabbix agent sends data to a server;
- A Zabbix server receives and processes the data;
- If the received data meet the specified conditions, a trigger is activated;
- The activated trigger indicates that there is a problem. A notification appears in the frontend (on a site), and depending on the configuration, an email notification is sent or some actions are performed (for example, a monitored service is restarted).
Zabbix can work with all known protocols. Thanks to the ability to use external scripts, Zabbix can execute and receive data from any executable scripts/binaries.
How to Install Zabbix Server on Linux (Ubuntu, CentOS)?
In this tutorial we’ll show how to install Zabbix Server on Linux (Ubuntu Server 18.4 and CentOS 8) using a package manager.
Go to the download page https://www.zabbix.com/download and select the repository that matches your Linux distribution. There are ready packages for all popular Linux distros.
For example, to install Zabbix on Ubuntu 18.04, select the following in turn:
Zabbix Version (5.0 LTS) -> OS Distribution (Ubuntu) -> OS Version (18.04 Bionic) -> Database (MySQL) -> Web server (Nginx or Apache).

Download and add the repository:
# wget https://repo.zabbix.com/zabbix/5.0/ubuntu/pool/main/z/zabbix-release/zabbix-release_5.0-1+bionic_all.deb
 # dpkg -i zabbix-release_5.0-1+bionic_all.deb
 # apt update
Then you can install the required packages:
# apt install zabbix-server-mysql zabbix-frontend-php zabbix-nginx-conf zabbix-agent

# rpm -Uvh https://repo.zabbix.com/zabbix/5.0/rhel/8/x86_64/zabbix-release-5.0-1.el8.noarch.rpm
 # dnf clean all
Suppose that nginx, MySQL/MariaDB, php and php-fpm are already installed on the server. Use the dnf (yum) package manager to install Zabbix Server and the agent:
# dnf install zabbix-server-mysql zabbix-web-mysql zabbix-nginx-conf zabbix-agent
Then create a database for Zabbix in MySQL (you can use PostgreSQL instead of MySQL, just replace ‘mysql’ with ‘pgsql’ in the previous commands).
Create a database and grant permissions to the user account, under which Zabbix will access the DB:
mysql -uroot
 mysql> create database zabbix character set utf8 collate utf8_bin;
 mysql> grant all privileges on zabbix.* to zabbix@localhost identified by 'ZabbixP@$$w0rd';
 mysql> quit;
Import the Zabbix database. Enter the password you specified when you created a user.
# zcat /usr/share/doc/zabbix-server-mysql*/create.sql.gz | mysql -uzabbix -p Zabbix
Edit /etc/zabbix/zabbix_server.conf, specify the password of the user you have created.
DBPassword=Zabbix_User_Password
Since in my case nginx is used as a web server, edit nginx.conf by uncommenting the following lines:
# listen 80;
# server_name example.com;
Remove # and replace example.com with the Zabbix server hostname. In my case it is test.zabbix.local.
/etc/httpd/conf.d/zabbix.conf.Set the time zone in PHP. Uncomment the following line in /etc/zabbix/php-fpm.conf:
php_value[date.timezone] = Canada/Pacific
You can also set these PHP parameters in /etc/php.ini:
memory_limit 128M
upload_max_filesize 8M
post_max_size 16M
max_execution_time 300
max_input_time 300
max_input_vars 10000
Add the zabbix-server service to startup and run it:
# systemctl enable zabbix-server zabbix-agent nginx php7.2-fpm
 # systemctl restart zabbix-server zabbix-agent nginx php7.2-fpm
Zabbix Web Interface Configuration
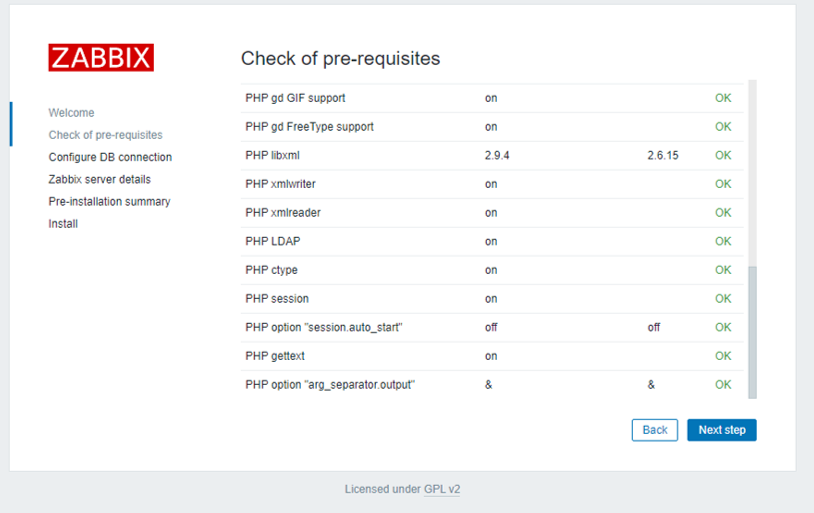
Now you must configure Zabbix frontent (web interface). Open the Zabbix server URL specified earlier in a browser. In my case, it is test.zabbix.local (or the domain you have specified. Remember to register it in your hosts file or on the DNS server). Make sure that OK is shown next to all installer requirements.
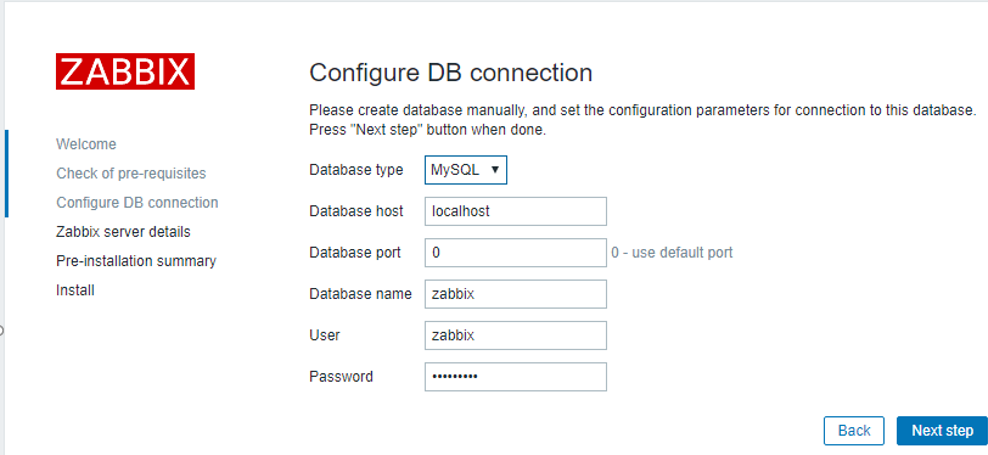
Specify the database connection parameters and user credentials to connect to the DB. Use the username and password created earlier.
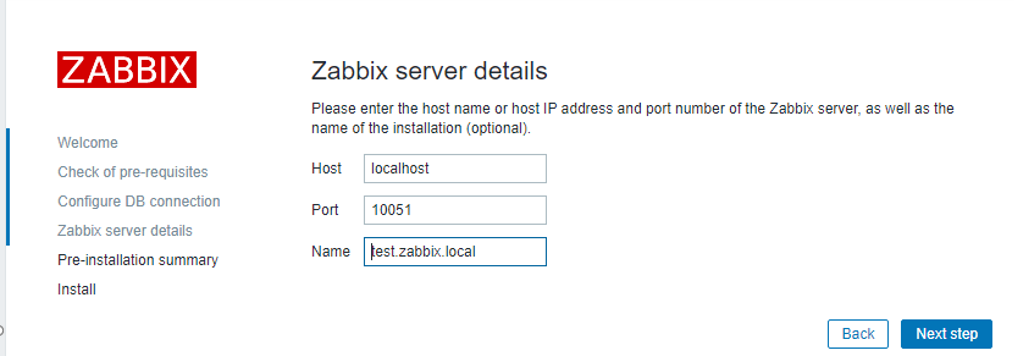
Specify the name of your Zabbix server. I recommend to leave the default port – TCP 10051.
- TCP 10050 — passive agent port, which Zabbix server uses to poll clients;;
- TCP 10051 — port through which Zabbix server receives data from clients (active agents).
Remember to open these ports on firewall. For example, on a Zabbix server running CentOS you can open the ports in firewalld using firewall-cmd:
# firewall-cmd --add-service={http,https} --permanentfirewall-cmd --add-port={10051/tcp,10050/tcp} –permanent
It is enough to open port 10050 on the agent:
# firewall-cmd --permanent --add-port=10050/tcp
Restart firewalld:
# firewall-cmd –reload
Then click Next Step and Finish. After the installation, you will be prompted to login. The default login is Admin, the default password is zabbix (change it).
Zabbix Server installation is over.
You can find step-by-step instructions on Zabbix Server installation on other OS and the guides on how to build zabbix-server from the source code or run it in docker containers on https://www.zabbix.com/download.
How to Install Zabbix Agent on Windows?
Let’s try to install a Zabbix agent on a server running Windows and add it to our Zabbix monitoring server. You can download a Zabbix agent version for Windows here: https://www.zabbix.com/download_agents. 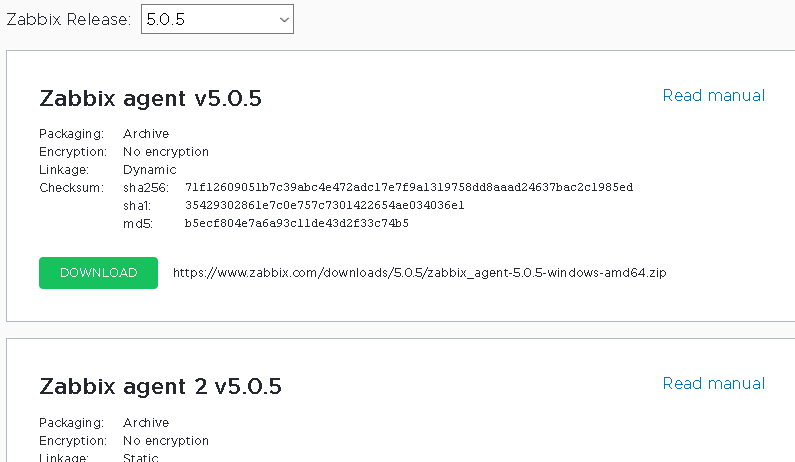
Select the agent version you need. I will choose msi (amd64) (without OpenSSL). If you are going to install Zabbix Agent on domain servers/computers using GPO or SCCM, you can download a ZIP archive with binary and configuration files.
Run the installer, accept the license agreement and specify the settings for connecting to the Zabbix server. Please note that in the “Server or Proxy for active checks” field I have entered an IP address in the IP:PORT format. Since I left a default port, I have entered 192.168.20.30:10051.

Click Next a couple of times, then click Install.
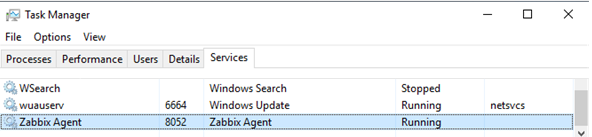
Make sure that the agent has been installed. Zabbix Agent must appear in the list of services.
Allow inbound connections from your Zabbix server IP address in Windows Firewall on your Windows host:
New-NetFirewallRule -DisplayName "ZabbixMonitoring" –RemoteAddress 192.168.20.30 -Direction Inbound -Protocol TCP –LocalPort 10050 -Action Allow
How to Add New Host on Zabbix Server?
To make sure that the agent is operable, add testnode2 host to your Zabbix server and assign some checks (templates) to it.
- Passive — a Zabbix server requests some data from the agent;
- Active — the agent is sending data to the server.
During the agent installation, we specified the server as IP:PORT for active checks.
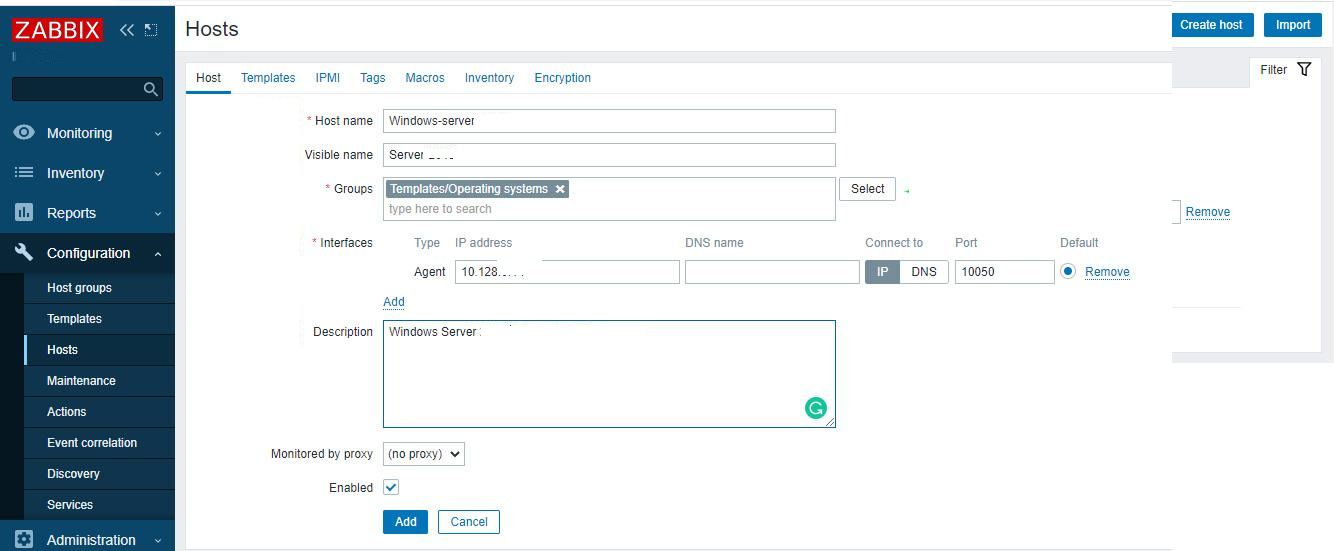
You can add a new monitoring host via Zabbix web interface. Go to Configuration -> Hosts.
Click Create host and fill in the details. Note that the Host name must exactly match the device hostname or the value of the Hostname parameter in the agent configuration file.
Add built-in Windows templates in the Templates tab. Templates in Zabbix are sets of values, triggers, graphs and discovery rules that may be assigned to one or more hosts.
The built-in templates have “active” label, and it means that active checks will be used.

Click Add. In order not to wait till the server and agent see each other (it usually takes a couple of minutes), restart Zabbix Agent service on the testnode2 and view the agent log (C:\Program Files\Zabbix Agent\zabbix_agentd.txt).

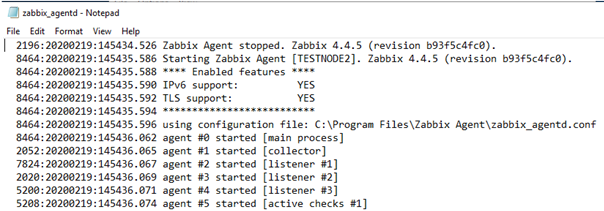
The “started [active checks #1]” message means that some active checks for the host have been found on the server. Then have a look at the data that your Zabbix server received from the agent. To do it, go to Monitoring -> Latest Data and select the host in the Hosts field.
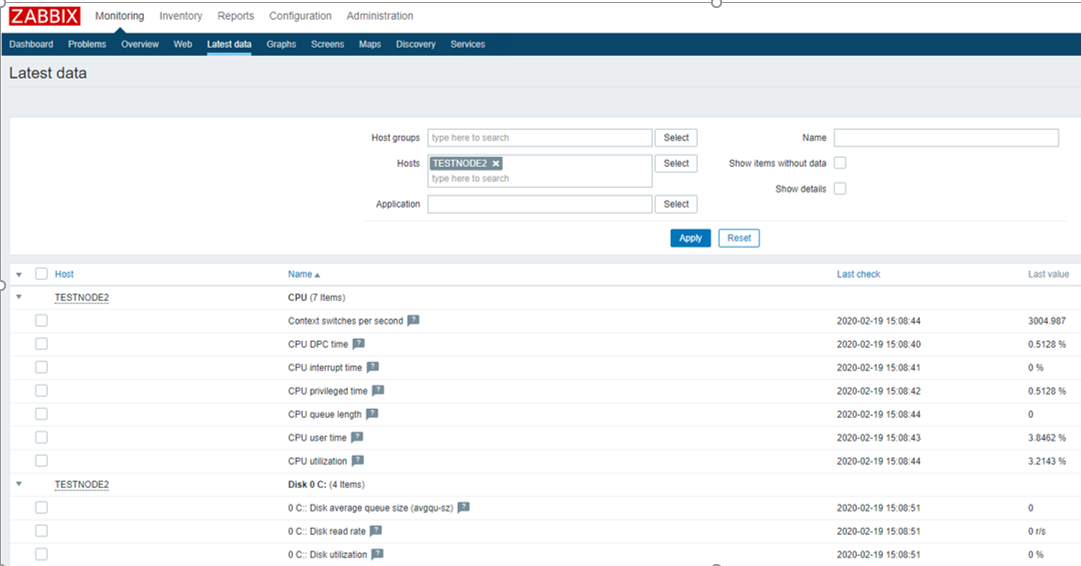
This section shows the latest data on the selected host or groups of hosts that have come to the Zabbix server.
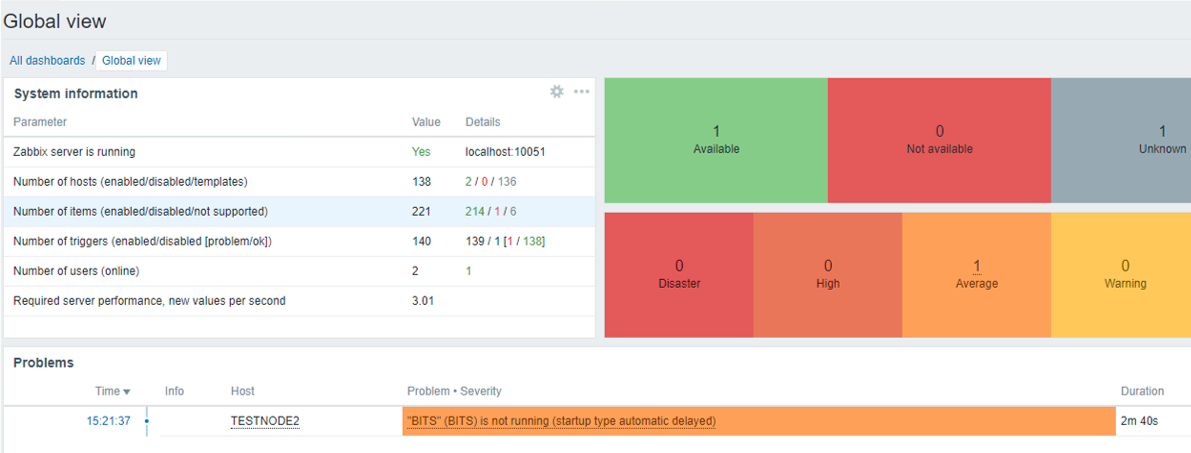
Please note that in my case the Zabbix dashboard contains a notification that the BITS service is not running. The notification appeared since we assigned built-in templates to our host. One of the templates has a BITS check, and the corresponding trigger activated if the BITS service is no in the Running state.
The Agent for Windows is configured.
Installing Zabbix Agent on Linux
Let’s install Zabbix Agent on Linux. To install Zabbix Agent on Ubuntu Server 18.04 using a package manager, download and the install Zabbix repo. Then install Zabbix Agent from the repository:
# wget https://repo.zabbix.com/zabbix/5.0/ubuntu/pool/main/z/zabbix-release/zabbix-release_5.0-1+$(lsb_release -sc)_all.deb
 # sudo dpkg -i zabbix-release_5.0-1+$(lsb_release -sc)_all.deb
 # sudo apt update
 # sudo apt -y install zabbix-agent
# rpm -Uvh https://repo.zabbix.com/zabbix/5.0/rhel/8/x86_64/zabbix-release-5.0-1.el8.noarch.rpm
 # dnf clean all
 # dnf install zabbix-agent
Prior to starting Zabbix agent, edit the configuration file /etc/zabbix/zabbix_agentd.conf. Specify the IP address of your Zabbix server for active checks.
Server=IP
ServerActive=192.168.20.30:10051
Hostname=testagent
Then start the agent service:
# service zabbix-agent start
Make sure that the agent has started successfully.
# cat /var/log/zabbix/zabbix_agentd.log
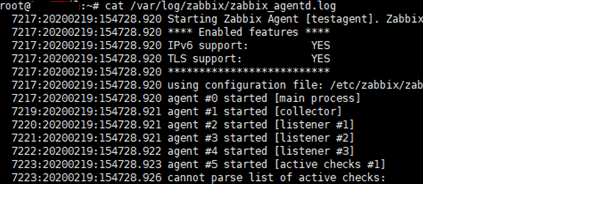
The line “cannot parse list of active checks” means that there are no active checks for the host on the server.
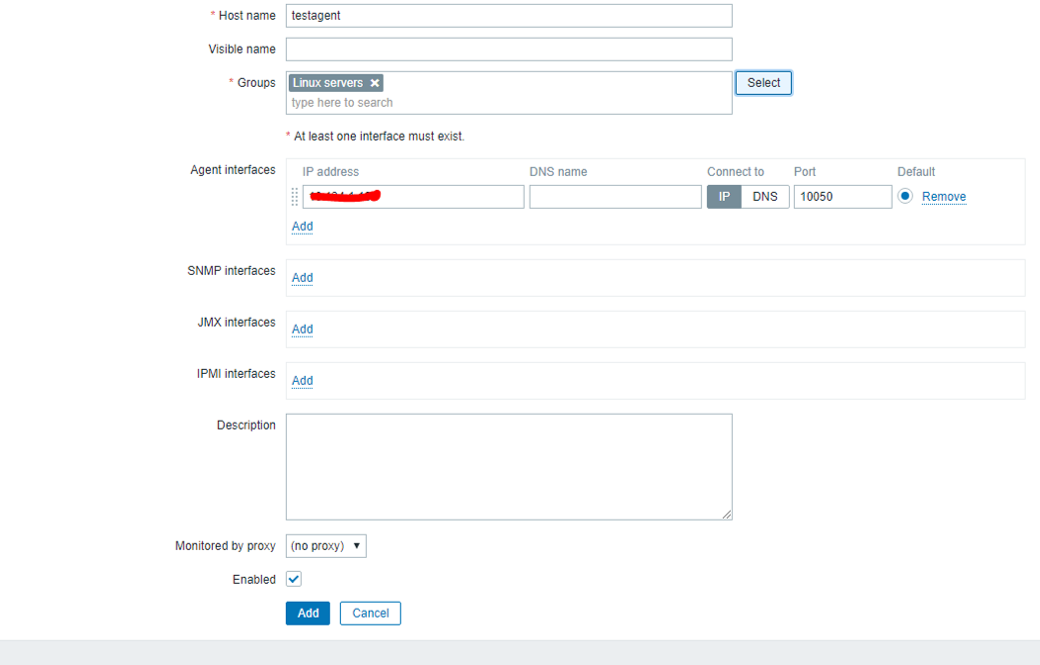
Like with Windows agent, you must add your Linux host to Zabbix . Note the Host name parameter in the host settings of your Zabbix server: it must match the Hostname parameter we have specified in the Zabbix Agent configuration file. In the config file above I specified the host name as testagent.
Restart your Zabbix agent and check the log. Make sure that data from the agent have appeared on your Zabbix server. Zabbix agent on Linux is configured.
In the next article we’ll look at agentless monitoring of host availability in Zabbix via ICMP Ping.