Simple Network Management Protocol (SNMP) is used to get information about the current status of servers, network equipment, printers or other IP devices. You can get different metrics through SNMP: CPU utilization, number of processes, state of services, etc. The major SNMP advantages are that it is supported by almost any devices and doesn’t require a separate monitoring system agent to be installed. In this article we will show how to install and configure an SNMP (and SNMP v3) agent on a Linux host running CentOS, RHEL, or Fedora.
Installing SNMP Agent and Diagnostic Tools on Linux
Before you install SNMP packages, install the latest updates on your server using dnf (yum):
# dnf update -y
Then install the SNMP agent and additional tools from the base repository:
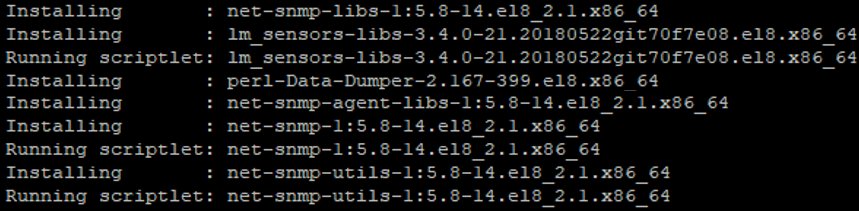
# dnf install net-snmp net-snmp-utils -y
How to Enable and Configure SNMP Agent on Linux?
Prior to SNMP configuration, create a copy of the original config file:
# mv /etc/snmp/snmpd.conf /etc/snmp/snmpd.conf.orig
Then edit the SNMP agent settings:
# nano /etc/snmp/snmpd.conf
Add the following lines:
rocommunity public
syslocation GE-DC2
syscontact [email protected]
Save the file (it is recommended to enter a correct location and a valid email address). Then enable the snmpd service and start it:
# systemctl enable snmpd.service
 # systemctl start snmpd
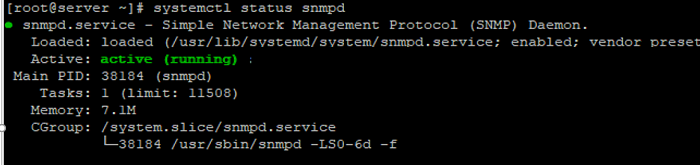
Make sure that the service is running:
# systemctl status snmpd
If you are using a firewall on your server, allow connections to TCP/UDP ports 161 and 162. Use the following commands to open SNMP ports in firewalld:
# firewall-cmd --zone=public --add-port=161/udp --permanent
 # firewall-cmd --zone=public --add-port=161/tcp –permanent
 # firewall-cmd --zone=public --add-port=162/udp --permanent
 # firewall-cmd --zone=public --add-port=162/tcp --permanent
 # firewall-cmd --reload
Poll SNMP Agent Using Snmpwalk
You can poll the SNMP agent using the snmpwalk tool. To check the service locally using the SMMPv2 protocol, use the command:
# snmpwalk -v 2c -c public -O e 127.0.0.1
If SNMP is configured correctly, you will receive a set of SNMP data from the agent.
Timeout: No Response from localhost
I fixed it by clearing the configuration file and adding only the lines I specified above. If you need some specific settings, check everything thoroughly, since the service starts without any problems, but it is not working.
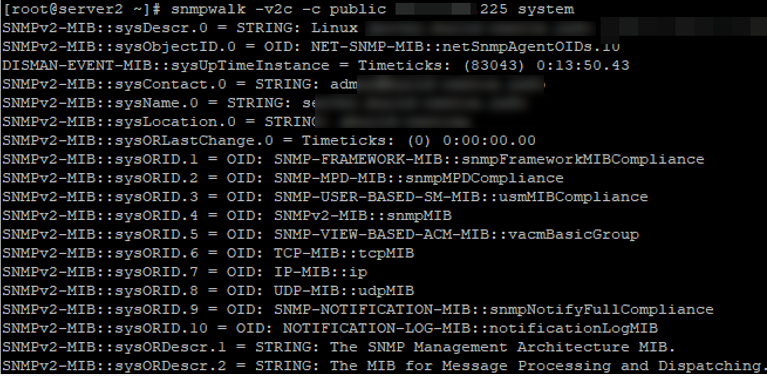
You can also query your server locally using this command:
# snmpwalk -v2c -c public localhost system
SNMPv2-MIB::sysDescr.0 = STRING: Linux server1.test.com 4.18.0-147.8.1.el8_1.x86_64 #1 SMP Thu Apr 9 13:49:54 UTC 2020 x86_64
SNMPv2-MIB::sysObjectID.0 = OID: NET-SNMP-MIB::netSnmpAgentOIDs.10
DISMAN-EVENT-MIB::sysUpTimeInstance = Timeticks: (106564) 0:17:45.64
SNMPv2-MIB::sysContact.0 = STRING: [email protected]
SNMPv2-MIB::sysName.0 = STRING: server1.test.com
SNMPv2-MIB::sysLocation.0 = STRING: GE-DC2
~~~~~~~~~~~~~~~~~~~~~~~~~~~~~~~~~~~~~~~~~~~~~
SNMPv2-MIB::sysORUpTime.6 = Timeticks: (0) 0:00:00.00
SNMPv2-MIB::sysORUpTime.7 = Timeticks: (0) 0:00:00.00
SNMPv2-MIB::sysORUpTime.8 = Timeticks: (0) 0:00:00.00
SNMPv2-MIB::sysORUpTime.9 = Timeticks: (0) 0:00:00.00
SNMPv2-MIB::sysORUpTime.10 = Timeticks: (0) 0:00:00.00
Then make sure that your SNMP agent is available remotely. Run this command on another server (install snmp tools prior to doing it):
# snmpwalk -v2c -c public 192.168.21.205 system
As you can see, the remote server received the information from the server over SNMP. Now you can add the server to any SNMP monitoring system (like Zabbix or Cacti).
Configure SNMPv3 on Linux CentOS/RHEL/Fedora
In the beginning of the article we have shown how to configure an SNMP agent that uses SNMP v1 and v2. SNMPv3 is a newer and more secure version of the protocol with support for authentication and encryption. To configure SNMPv3, create a user with a password, set an encryption password, access rights and an encryption algorithm (MD5 or SHA).
To create a user for SNMPv3, stop the snmpd daemon:
# systemctl stop snmpd
Then you can create a user:
# net-snmp-create-v3-user -ro -A o2ps2w0dD -a SHA -X r30svV33 -x AES snmpuser
net-snmp-create-v3-user [-ro] [-A authpass] [-a MD5|SHA] [-X privpass][-x DES|AES] [username]
- -ro – it means that a user has read-only privileges
- Authpass – authentication password
- Privpass – private key
After running the command, a user with the specified password and key will be created:

Start the service:
# systemctl start snmpd
Try to poll the SNMP agent using snmpwalk. Note that to poll over SNMPv3, you must specify the user name, the password and the key.
# snmpwalk -v3 -a SHA -A o2ps2w0dD -x AES -X r30svV33 -l authPriv -u snmpuser 192.168.21.205 | head
2 comments
Replace the wrong command:
# firewall-cmd –zone=public –add-port=161/tcp –permanent
to:
# firewall-cmd –zone=public –add-port=161/tcp –permanent
your wordpress breaks some lines. replace the dash with a double hyphen