To ensure the stability and security of your Windows device, you should regularly install security updates (manually using MSU/CAB files or automatically via Windows Update). Microsoft releases new Windows updates on the second Tuesday of each month. In some cases, new updates can cause different issues (due to poor testing, engineering errors, hardware incompatibility, etc.). In these cases, the installed update must be removed (Ways to uninstall updates in Windows). However, it happens that the Windows operating system stops booting (crashes into BSOD with CRITICAL_PROCESS_DIED, INACCESSIBLE_BOOT_DEVICE errors, or automatically reboots) and you cannot remove the problematic update.
Let’s look at how to properly uninstall updates in Windows 10 and 11 (Windows Server 2019/2016/2012) if the operating system doesn’t boot.
How to Uninstall Updates Offline using Windows Recovery Environment (WinRE)?
If Windows won’t boot, you can try using the Windows Recovery Environment (WinRE) to fix common errors and remove the latest installed updates.
The Windows Boot Manager will attempt to automatically boot the computer into the Windows Recover Environment if three previous attempts to boot Windows were unsuccessful. You can simply interrupt the boot using the Power button 3 times in a row.
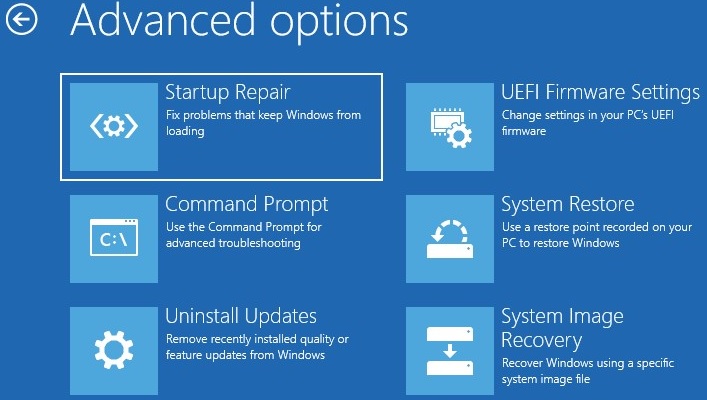
On the WinRE screen, select Troubleshoot. Here are some solutions to common Windows boot problems:
- Startup repair – try using this option first so that Windows will try to automatically fix common startup problems;
- System Restore – allows you to roll back to one of the previous restore points;
- System Image Recovery – allows you to restore your computer from a previously created Windows system image backup;
- Uninstall Updates – this mode allows you to remove the latest security updates or Windows 10 build upgrades.
Select Uninstall Updates. Choose one of the modes:
- Uninstall latest quality updates – used to remove the latest monthly Windows update;
- Uninstall latest feature update – used to uninstall Windows 10 build.
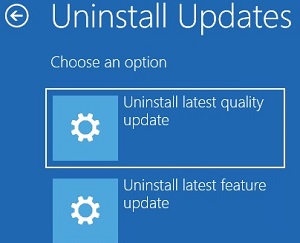
Select the option you need, wait for the update to be uninstalled, restart your computer in normal mode.

In some cases, when uninstalling updates via WinRE, you may see an error:
You have pending update actions and we won't be able to uninstall the latest quality/feature update of Windows. Try running Startup Repair instead.
In this case, you must manually delete the pending.xml file (described in the next section).
How to Remove Updates If Windows Won’t Boot?
If Windows doesn’t boot in recovery (or Safe) mode after installing updates, you need to boot your computer from any available bootable disk or USB flash drive. This can be Windows Recovery Environment (WinRE), Windows installation disk (CD/DVD/USB), ERD (aka MSDaRT 10), or any other bootable media.
In this example, I will boot my computer from a Windows 10 x64 installation USB flash drive. When booting, go to your computer’s BIOS/UEFI and change the boot order by selecting your USB stick as the primary boot device.
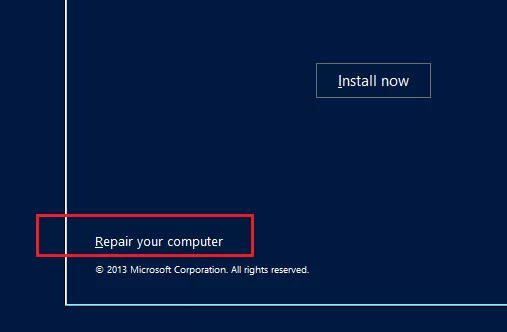
On the second screen with the prompt to start installing Windows, click Repair Computer or press Shift+F10.
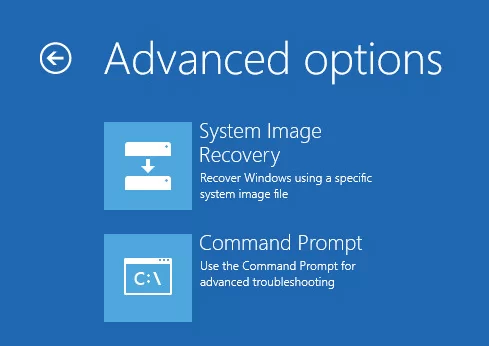
In the first case, select Troubleshoot -> Command Prompt.
In the WinPE command prompt window that appears, you need to determine the drive letter assigned to your Windows system partition (It can be any drive other than C:\).
Run the command: DISKPART
Display the list of partitions on local disks: list volume

In my example, WinPE didn’t assign a drive letter to my Windows partition. In my screenshot, this is 39 GB Volume 1 with NTFS file system (100 MB partition is the EFI boot partition).
To assign it a drive letter D, use the commands:
select volume 1
 assign letter=D
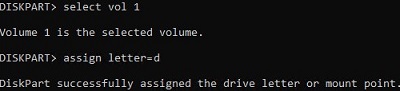
Run the list vol command again to verify that the Windows partition is assigned a drive letter.
End the diskpart session with the command: exit
In our example, you can see that the drive letter D:\ is assigned to the Windows system partition (use your drive letter in the following commands).
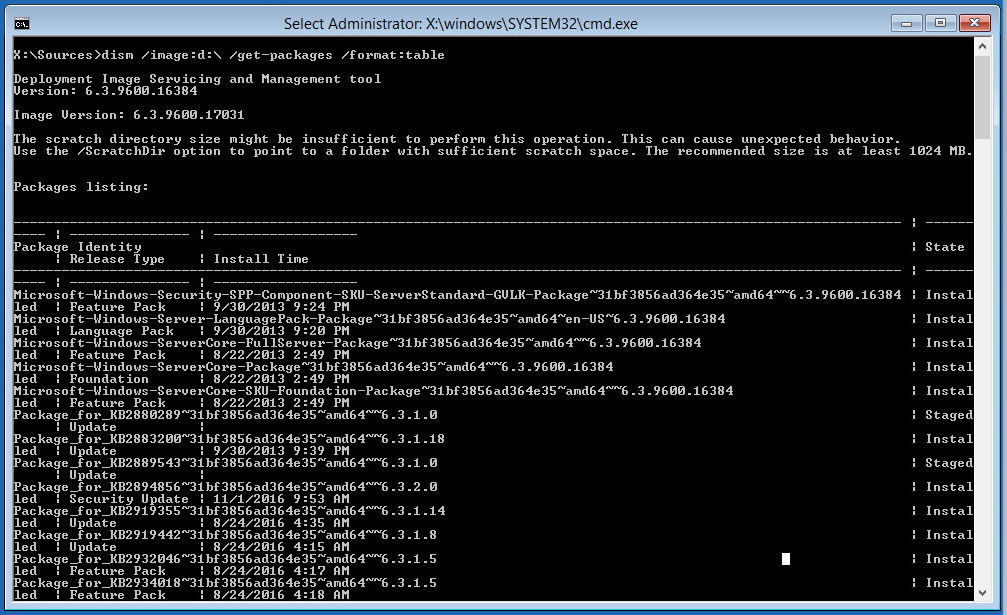
Display a list of update packages installed in the offline Windows image using DISM:
DISM /Image:D:\ /Get-Packages /format:table
If you know exactly, which specific update (KB) caused the problem, its number can be used as a filter:
DISM /Image:D:\ /Get-Packages /format:table | find “4052978”
Or you can filter the list by the update installation date:
DISM /Image:D:\ /Get-Packages /format:table | find “10/26/2021”
(the date format depends on the Windows localization settings, in my example, the US date format is used)

DISM /Image:D:\ /Get-Packages /format:table > d:\updates.txt
 Notepad d:\updates.txt
Now you need to copy the identifier of the problem update package to the clipboard (select the name of the package in the command prompt using the mouse and press Enter; to paste the text, just right click where you need).

You can remove the update using the following DISM command:
DISM /Image:D:\ /Remove-Package /PackageName:Package_for_KB4052978~31bf3856ad364e35~amd64~~6.3.1.0

If you don’t know exactly, which update has caused the problem, remove all recently-installed packages one by one. After removing each update, restart your computer and check if Windows boots normally.
If you need to remove pending updates (with a Pending status), you need to delete the pending.xml file. To do this, run the following commands:
del D:\Windows\WinSxS\pending.xml
del D:\Windows\WinSxS\cleanup.xml (file may be missing )
del D:\Windows\SoftwareDistribution\Download\*.*
dism /image:D:\ /ScratchDir:D: /cleanup-image /RevertPendingActions
This operation will undo any pending actions from previous maintenance operations, as these actions may cause the Windows to fail to boot.
You can then use DISM to check and fix the Windows Component Store in the offline mode (you need a Windows installation image):
Dism /image:D:\ /Cleanup-Image /RestoreHealth /Source:F:\sources\install.wim
If you have an MSDaRT recovery image, it’s even easier to remove problematic updates You just have to boot from the MSDaRT disk (the OS bitness must match), Diagnostics -> Microsoft Diagnostics and Recovery Toolset. In the list of tools, select Hotfix Uninstall.
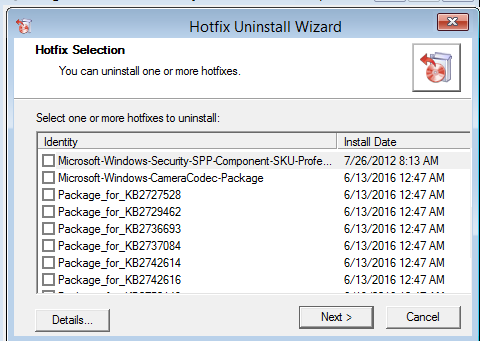
Just select the updates you want to remove and click Next.
2 comments
Thank you very much.
This post save my life several time.
Even me too and one of best site for IT people